Best Ways to Prevent Water Damage This Fall

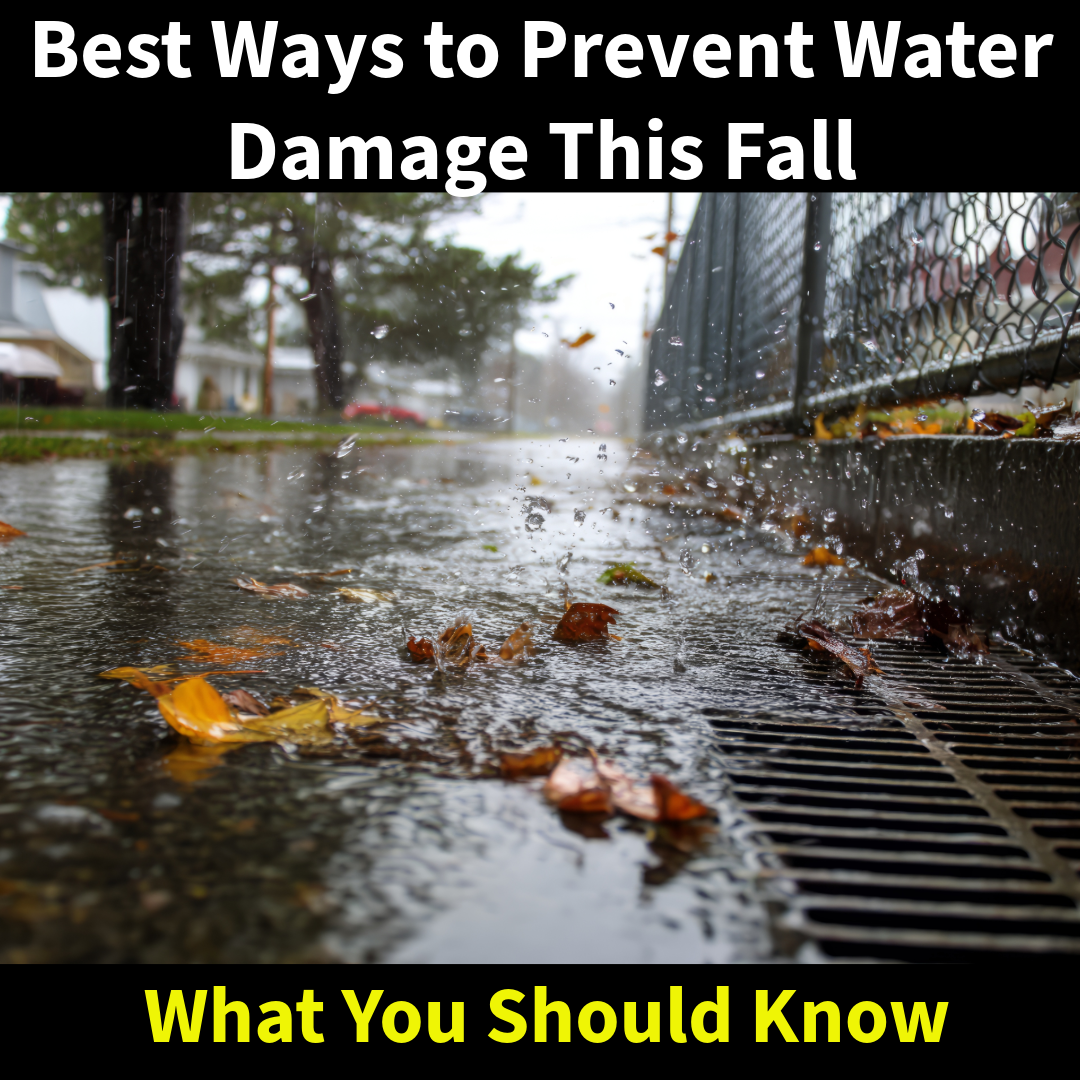
As summer heat fades and the leaves begin to fall, homeowners face a new set of risks when it comes to protecting their property. Autumn brings heavy rains, dropping temperatures, and plenty of debris that can quickly overwhelm your home’s defenses. Without proper preparation, these seasonal changes can lead to costly water damage that only worsens as winter approaches.

The good news? A few smart steps now can save you from major headaches later. Here are the best ways to keep your home dry and safe this fall.


Keep Water Flowing Away From Your Home

Falling leaves and twigs are more than just a chore — they can clog gutters and downspouts, forcing water to spill over and pool near your foundation. That water doesn’t just disappear; it seeps into basements and crawlspaces.

  • Clean gutters and downspouts regularly throughout the season.
  • Make sure downspouts extend far enough to direct water away from the house.
  • Check the grading around your home — soil should slope away, not toward your foundation.

Inspect Your Roof, Windows, and Doors

Your roof and exterior openings are the first line of defense against fall rains. After months of hot sun and summer storms, shingles and flashing may already be weakened.

  • Look for missing or curled shingles.
  • Inspect flashing around chimneys and vents.
  • Check windows and doors for gaps or failing caulk where water could seep in.

Protect the Basement and Crawlspace

The lowest parts of your home are often the first to show signs of water damage. As nights grow colder, small cracks in the foundation can widen, letting in seepage.

  • Seal visible cracks and monitor damp spots.
  • Test your sump pump by pouring water into the pit to ensure it runs properly.
  • If you don’t already have one, consider a battery backup system in case of power outages during fall storms.

Prepare Your Plumbing for Cooler Weather

Burst pipes may feel like a winter problem, but prevention starts in the fall. Once the first freeze arrives, unprotected outdoor plumbing is at risk.

  • Disconnect garden hoses and shut off outdoor spigots.
  • Insulate any exposed pipes in basements, garages, or crawlspaces.
  • Have your plumbing system checked for leaks before colder nights set in.

A Little Prevention Goes a Long Way

Taking time to handle these tasks now can help you avoid the stress and cost of water damage later in the season. Still, even the most prepared homeowner can’t always control what Mother Nature has in store.

If you notice signs of water damage — damp walls, musty odors, standing water, or mold — MSI is ready 24/7 to help. Our water damage restoration experts will quickly assess the problem, stop the damage from spreading, and restore your home so you can focus on enjoying the season.

📞 Call MSI anytime at 215-339-1769 for fast, reliable water damage restoration.

Types of Mold Testing: Part 3 — Bulk Sampling Explained

When it comes to mold testing, there isn’t a one-size-fits-all method. In our earlier posts, we covered air sampling and surface sampling, both of which are useful for detecting airborne spores and identifying mold growth on visible surfaces. But what if the concern runs deeper — inside the actual building materials? That’s where bulk sampling comes in.

What Is Bulk Sampling?

Bulk sampling involves physically removing a portion of a material suspected of mold contamination — such as a piece of drywall, insulation, wood, or carpet — and sending it to a laboratory for analysis. Unlike air testing, which measures spores in the environment, or surface testing, which captures mold directly from a wall or countertop, bulk sampling provides direct evidence of what’s inside the material itself.

How the Process Works

  1. Selection of the Sample Area – A certified inspector identifies the material most likely to show contamination. This might be drywall around a window leak, flooring in a basement, or insulation inside a wall cavity.
  2. Careful Removal – A small section of the material is cut out using sterile tools. It must be handled carefully to avoid cross-contamination.
  3. Sealed for Transport – The sample is placed in a sterile container or bag and labeled with the exact location it came from.
  4. Laboratory Analysis – At the lab, technicians examine the material under a microscope and may perform cultures to identify the exact type of mold and the extent of colonization.
  5. Report & Interpretation – The results are compared against industry standards and presented in a clear report that homeowners, insurance adjusters, or even courts can understand.

Why Bulk Sampling Matters

Bulk sampling is not always necessary, but when it is, it can be the deciding factor in serious cases:

  • Insurance & Legal Disputes – A homeowner claiming hidden water damage or a tenant alleging unsafe living conditions often needs indisputable proof. A piece of mold-infested drywall carries far more weight than air readings alone.
  • Remediation Decisions – Sometimes materials can be cleaned and salvaged. Other times, replacement is unavoidable. Bulk sampling helps make that call with certainty.
  • Health & Safety – If mold is inside porous materials, it can continue spreading even if the surface looks clean. This test reveals contamination most people can’t see.

A Real-World Scenario

Consider a homeowner who notices a musty odor in their finished basement but sees no visible mold. Air samples show elevated spore counts, but the insurance company questions the source. During inspection, we identify staining on a small section of drywall near the baseboard. A bulk sample is collected and sent to the lab, which confirms active mold growth within the gypsum core. This undeniable evidence proves the presence of hidden contamination, helping the homeowner secure coverage for full remediation.

Pros & Cons of Bulk Sampling

Pros:

  • Conclusive, physical evidence of contamination.
  • Strong documentation for lawsuits, insurance claims, and disclosure cases.
  • Guides clear remediation decisions.

Cons:

  • Destructive — requires cutting into building materials.
  • Limited to the exact spot tested, meaning other areas may still need further investigation.
  • More time-intensive than surface swabs.

Final Thoughts

Bulk sampling may not be needed for every project, but when legal, insurance, or health questions arise, it can be the most powerful tool in mold testing. With over 27 years of experience, MSI has performed thousands of tests and has been called upon as an expert witness in countless disputes. Our team knows when bulk sampling is the right step — and how to use it to give homeowners the clarity they need.

A Fresh Start: Hoarding Cleanup Success Story in Paoli, PA

Hoarding is often misunderstood. It’s not simply about having “too much stuff” — it’s about the challenges someone faces when their home becomes unsafe or overwhelming. Recently, our team at MSI was called to a home in Paoli, PA, where one family’s story shows just how life-changing the right help can be.

The Call for Help

A mother reached out to us, concerned about her daughter who had been struggling with hoarding and living in unsafe conditions. The home had very few walkable pathways, and clutter was piled in ways that hid serious issues like water damage and mold growth from past leaks. On top of that, a beloved cat was using the carpet as a bathroom, making the environment even more unsanitary.

The daughter made a courageous step — she admitted she needed help and wanted her story shared, privately, to encourage others who might be in the same situation.

What We Found Inside

When we arrived, it was clear this wasn’t just a case of “too many belongings.” The conditions created real health and safety concerns:

  • Blocked pathways made moving around dangerous in the event of an emergency.
  • Hidden mold and water damage were worsening behind piles of clutter.
  • Animal waste on the carpets posed biohazard risks.
  • Underlying plumbing and electrical issues needed to be addressed for the home to be safe again.

Restoring the Home — and Peace of Mind

Our team carefully sorted, removed, and cleaned the property, always with compassion and respect for the homeowner. We remediated the mold, addressed the water damage, and pointed out the additional repairs needed for long-term safety.

This was about more than just cleaning a house. It was about helping someone reclaim their home and their health.

A Positive Outcome

The best part of this story is its ending — or rather, its new beginning. The homeowner has now been back in her Paoli home for over a year. She’s maintained a safe, clean environment and hasn’t fallen back into old habits. Her courage in facing the problem and asking for help gave her the fresh start she deserved.

Helping Others Move Forward

At MSI, we understand that hoarding cleanup is about more than clutter. It’s about compassion, safety, and a second chance at living comfortably at home. If you or a loved one is facing a similar situation, know that you’re not alone.

📞 Call us today at 215-339-1769 for confidential help.

Why Sewage Losses Happen – Causes, Risks, and the Right Way to Clean Them

When most people think of water damage, they picture a burst pipe or a leaky roof. But sewage losses are far more dangerous and destructive. Unlike clean or gray water leaks, sewage water (also known as Category 3 water) is highly contaminated and requires immediate professional cleanup. Understanding why sewage losses happen — and how to respond — can help protect your health, your home, and your investment.


What Is a Sewage Loss?

A sewage loss occurs when wastewater backs up into a home or business instead of draining properly. This water isn’t just dirty — it contains harmful bacteria, viruses, parasites, and chemical contaminants. Because sewage can spread quickly through flooring, walls, and personal belongings, every hour of delay makes cleanup more complex and costly.


The Most Common Causes of Sewage Losses

  1. Aging or Damaged Sewer Lines
    Many properties still rely on older clay, cast iron, or Orangeburg pipes that deteriorate over time. Cracks, collapses, and corrosion can all cause sewage to back up into a property.
  2. Tree Root Intrusion
    Roots naturally seek moisture and can break into underground sewer pipes through tiny cracks or loose joints. Once inside, they expand, creating blockages that force sewage back into the property.
  3. Heavy Rains and Flooding
    When municipal sewer systems are overwhelmed by storms or snowmelt, excess water can push sewage backwards into homes — particularly basements and first floors.
  4. Clogs from Improper Disposal
    Flushing non-flushable items like wipes, paper towels, hygiene products, or pouring grease down drains creates blockages that prevent proper flow. Over time, this leads to sudden and messy backups.
  5. Sewer Line Breaks or Misalignment
    Shifting soil, construction activity, or poor installation can cause joints to separate, collapse, or misalign. This restricts sewage flow and increases the risk of backups.

Why Sewage Backups Are So Dangerous

  • Serious Health Hazards
    Category 3 water contains pathogens that can cause gastrointestinal illness, skin infections, and respiratory problems. Direct contact or even airborne exposure can be harmful.
  • Extensive Property Damage
    Sewage water saturates drywall, flooring, insulation, and furniture. Most porous materials must be removed, not just cleaned, to prevent long-term contamination.
  • Lingering Odors and Hidden Contamination
    Even after water is removed, dangerous bacteria can remain inside building materials, causing odors and long-term health risks if not properly treated.

Why Professional Cleanup Is Essential

Sewage losses are not a DIY job. Shop-vacs, mops, and household disinfectants cannot fully sanitize a contaminated area. Professional sewage cleanup includes:

  • Full Safety Precautions – Crews wear PPE including respirators, gloves, and protective suits.
  • Specialized Extraction – Industrial pumps and vacuums remove contaminated water quickly.
  • Controlled Demolition – Unsalvageable materials such as carpet, insulation, and drywall are safely removed.
  • Disinfection & Sanitization – EPA-approved disinfectants are applied to all affected surfaces.
  • Structural Drying – Dehumidifiers and air movers prevent mold growth after cleanup.

Protecting Your Property from Future Sewage Losses

While not all sewage losses are preventable, there are steps you can take to reduce risk:

  • Schedule routine inspections of older sewer lines.
  • Avoid planting trees near underground sewer pipes.
  • Install a backwater valve to prevent municipal backups during storms.
  • Never flush wipes, feminine products, or paper towels — even if labeled “flushable.”
  • Properly dispose of cooking grease instead of pouring it down drains.

Fast Response Matters

Every minute counts during a sewage loss. Delaying cleanup can mean higher repair costs, more property damage, and greater health risks.

At MSI, our trained teams are available 24/7 for emergency sewage cleanup and water damage restoration. We follow strict industry standards to remove hazardous water, sanitize the property, and restore it safely — giving you peace of mind when you need it most.

Call MSI today at 215-339-1769 for immediate sewage cleanup services.

Soft Goods Restoration: How Smoke Affects Clothing, and Upholstery

When Smoke Clings Beyond the Flame

After a fire, it’s not only the walls, ceilings, and furniture that suffer. Soft goods — clothing, bedding, drapes, and upholstered furniture — absorb smoke and soot deep into their fibers. Even items that look “untouched” by flames can carry lingering odors and harmful residues that pose both comfort and health concerns.

Why Smoke and Soot Are So Difficult to Remove

Unlike surface cleaning, soft goods restoration is challenging because:

  • Porous Materials: Fabrics and stuffing absorb smoke particles quickly, trapping odors.
  • Chemical Residues: Soot contains acids that can break down fibers and cause discoloration.
  • Health Risks: Residual smoke odors are not just unpleasant — they can trigger asthma, allergies, and other respiratory issues.

Professional Cleaning vs. DIY Attempts

Home washing machines and off-the-shelf cleaning products are rarely enough to eliminate smoke damage from fabrics. In fact, improper cleaning can “set” the odors and stains, making them harder to remove. Professional fire damage teams use specialized methods such as:

  • Ozone Treatment to neutralize odor molecules.
  • Thermal Fogging that penetrates fibers with odor-counteracting agents.
  • Specialized Laundering with detergents formulated to break down smoke residues.

Commonly Restored Soft Goods

  • Clothing and footwear
  • Bedding and pillows
  • Curtains and drapes
  • Upholstered chairs, sofas, and cushions
  • Area rugs and carpets

Why Acting Quickly Matters

The longer smoke sits, the harder it is to remove — and in many cases, fabrics may need to be discarded if not treated promptly. Quick professional intervention gives homeowners the best chance of saving items with both financial and sentimental value.

Call the Experts Who Know Soft Goods Restoration

MSI has decades of experience restoring fire-damaged homes, including delicate soft goods. Our team knows how to salvage what matters most, using proven techniques to remove smoke, soot, and odors safely and effectively.

If your home has suffered a fire, don’t assume your clothing, bedding, or furniture is lost — call MSI today at 215-339-1769 for expert fire and smoke restoration.

Mold Testing Part 2: Surface Sampling

What Is Surface Sampling?

While air testing measures spores floating in the air, surface sampling targets visible or suspected mold growth on specific materials. This method involves swabs, tape lifts, or bulk samples taken directly from the surface of walls, furniture, or building materials.

When Is Surface Sampling Needed?

  • Visible Spots or Stains – to confirm whether discoloration is mold or another substance.
  • After Water Damage – to verify whether mold has developed on building materials.
  • Post-Remediation Clearance – ensuring the affected areas are truly mold-free.
  • Hidden Suspicions – when air samples come back inconclusive but the area still looks questionable.

Different Methods of Surface Sampling

  • Swab Samples – cotton-like swabs collect material from suspicious areas.
  • Tape Lifts – adhesive tape lifts spores directly off surfaces for lab analysis.
  • Bulk Samples – actual pieces of contaminated material (like drywall) are sent to the lab for testing.

In some cases—such as disputes between landlords and tenants, insurance claims, or litigation—surface sampling provides a level of certainty that air testing cannot always guarantee. Because spores don’t always become airborne, an air sample might miss contamination that’s clearly visible on a surface. By taking a direct lift from the material itself, you know exactly what is present in that location.

This makes surface samples a powerful tool when clear, documented evidence is needed. Whether it’s a legal case, a landlord–tenant disagreement, or simply providing peace of mind, surface testing can deliver indisputable results that stand up to scrutiny.

Limitations of Surface Sampling

Surface tests don’t measure what’s in the air and can’t determine the overall air quality of the property. They also only represent the spot tested, not the entire room. That’s why professionals often use surface samples in combination with air testing for a complete picture.

Why Professional Sampling Matters

Knowing when to use surface testing—and how to interpret the results—isn’t always straightforward. At MSI, we’ve been conducting mold inspections and testing since 1998, and we know which situations call for air testing, surface testing, or both.

Takeaway

Surface sampling is a valuable tool, but it’s just one part of a complete mold inspection strategy. Trusting a certified professional ensures accurate results and the right plan of action for your property.

The Difference Between Fire Damage Cleaning & Fire Damage Restoration

After a fire, it’s natural to want your property cleaned up as quickly as possible. But there’s a big difference between a simple “fire cleanup” and a full fire damage restoration. While cleaning may make things look better on the surface, restoration ensures your home or business is truly safe, structurally sound, and free from hidden damage.

At MSI, we’ve seen many cases where homeowners thought their property was “cleaned” after a fire—only to find lingering smoke odors, soot stains, or even hidden health hazards weeks later. Here’s why understanding the difference matters.


What Fire Damage Cleaning Usually Means

  • Surface-Level Work – Many cleaning crews focus on wiping down visible soot or debris but don’t address hidden contamination.
  • Odor Cover-Ups – Basic cleaning often relies on air fresheners or sprays that mask smoke smells temporarily instead of removing them.
  • Cosmetic Results Only – Cleaning may make the home look livable but doesn’t address the damage beneath walls, inside ducts, or in porous materials.

What True Fire Damage Restoration Involves

  • Comprehensive Assessment – Restoration begins with inspecting not just what you can see, but also HVAC systems, insulation, and structural materials where smoke and soot hide.
  • Advanced Soot & Smoke Removal – Using HEPA vacuums, air scrubbers, and specialized techniques, restoration removes contamination at the microscopic level.
  • Odor Elimination – Professional methods neutralize smoke odors permanently, instead of covering them up.
  • Structural and Safety Repairs – Restoration includes repairing or replacing fire-damaged materials to return your property to a safe, pre-loss condition.
  • Insurance Documentation – A true restoration team documents all damage and repairs so your insurance claim reflects the real scope of loss.

Why This Difference Matters

Choosing cleaning instead of restoration might save money up front, but it often leads to:

  • Persistent smoke odors that never go away
  • Hidden soot exposure that affects indoor air quality
  • Structural problems that resurface months later
  • Insurance disputes when damage wasn’t documented properly

When fire strikes, your home or business deserves more than a cosmetic cleanup. You need a full restoration to protect your property and your health.


Trust MSI for Complete Fire Damage Restoration

At MSI, we don’t just clean—we restore. Our certified team uses proven methods to remove hidden soot, neutralize odors, and repair the damage the right way. We’ve helped countless homeowners and businesses recover safely after fire, and we can do the same for you.

Can Insurance Tell You Who to Hire? The Truth You Need To Know

When property damage strikes, homeowners often feel pressured to follow the insurance company’s recommendations. It’s common to hear: “We’ll send out our preferred contractor.” But here’s the truth — your insurance company cannot force you to use their contractor.


Why Insurance Companies Push “Preferred Vendors”

Insurance companies often have deals with certain contractors. These partnerships are designed to keep costs low for the insurer, not necessarily to ensure the best restoration for your home. While some preferred vendors do quality work, others may cut corners to keep costs down, leaving you with hidden damage that causes bigger problems later.


You Have the Right to Choose

No matter what the insurance adjuster says, you are free to hire the restoration company you trust. In Pennsylvania, New Jersey, and Delaware, consumer protection laws support your right to choose. Your insurance policy covers the work based on the damage, not the contractor.


Risks of Letting Insurance Dictate

Relying only on the insurance company’s pick can lead to:

  • Incomplete drying after water damage, which can trigger mold growth weeks later.
  • Surface-only soot cleaning, leaving behind harmful residues and odors.
  • Mishandled biohazard or hoarding cleanups, creating liability risks for the property owner.

How to Choose the Right Restoration Company

When damage happens, focus on choosing a company that puts your home first:

  • Look for certifications such as IICRC.
  • Choose experienced professionals who regularly handle insurance claims.
  • Ask for transparency in estimates, photos, and reports.

The Bottom Line

Your home is your responsibility — not your insurance company’s property. Don’t let them steer you toward contractors who might not serve your best interest. You have the right to decide who restores your home.

At MSI, we’ve been helping homeowners navigate claims and restore their properties since 1998. If disaster strikes, call us first — we’ll work with your insurance, but we’ll always work for you.

From Denied Claim to Full Coverage — Media, PA Water Loss

What seemed like a small water damage issue on the first floor of a single-family home in Media, PA turned out to be a multi-floor problem that had been quietly causing damage for some time. This project revealed the hidden extent of water damage — and how having an experienced restoration company can make all the difference when dealing with insurance claims.


The First Call

When the homeowner first contacted us, they believed the water damage was limited to their first floor. Upon inspection, our team found additional damage extending upward to the second floor and downward into the finished basement. With no visible source in sight, we began carefully opening walls to trace the water’s path.


Finding the Culprit

The break was eventually traced to a cracked stack pipe in the second-floor wall. The homeowner had already filed an insurance claim, but it had been denied because the insurer labeled it a “long-term leak” — a common reason for claim rejections, especially when mold is involved.

However, our inspection told a different story.


Proving the Case

We documented how the crack in the pipe was small enough to release only minimal amounts of water at a time. The insulation and double-layered drywall/plaster acted like a sponge, absorbing the water before any signs appeared on the surface. By the time damage became visible, the underlying problem had been active for some time — but not because it was ignored.

Once the wall was opened, a plumber could repair the pipe, and with our findings, the insurance company reversed its decision and covered the claim.


Understanding Category 3 Water

This was a Category 3 water loss — the most hazardous classification:

  • Category 1: Clean water from a sanitary source.
  • Category 2: “Gray” water with some contamination.
  • Category 3: “Black” water containing sewage, bacteria, and dangerous pathogens.

Because the cracked stack pipe was part of the home’s waste system, any escaping water posed serious health risks. Immediate, professional remediation was essential to remove contaminated materials, sanitize the area, and prevent mold growth.


Why Stack Pipes Crack

Stack pipes — the vertical plumbing pipes that carry waste and water from upper floors — can crack for several reasons:

  • Material fatigue in older cast iron or PVC systems.
  • Shifting or settling of the building.
  • Temperature fluctuations causing expansion and contraction.
  • Corrosion or rust over time.

Even a small crack can cause major hidden damage, as this case clearly showed.


The MSI Difference

Our role went far beyond cleanup. We:

  • Discovered the hidden extent of the damage.
  • Removed contaminated materials from all affected floors.
  • Performed mold remediation to IICRC standards.
  • Coordinated with the plumber for quick repairs.
  • Provided the documentation needed to reverse a denied insurance claim.

When you’re facing water damage — especially from a hidden source — you need a restoration company that knows how to uncover the problem, clean it up properly, and help you get it covered.


Have water or mold damage you can’t figure out? Call MSI at 877-712-1600. We’ll find the source, stop the damage, and help restore your home safely.

Types of Mold Tests – Part 1: Air Sampling Explained

When it comes to mold, what you see is only part of the story. Mold spores are microscopic and can be floating through the air even when surfaces look clean. That’s where air sampling comes in — a testing method designed to find out what you can’t see and help determine if indoor air quality has been compromised.


What Is Air Sampling?

Air sampling measures the concentration and types of mold spores in the air at a given time. This is done by pulling air through a specialized cassette that traps particles onto a slide. The sample is then sent to a certified laboratory, where it’s analyzed under a microscope to identify mold types and spore counts.


How It’s Done

  • Step 1 – Site Selection: We select sampling points based on the home’s size and layout, taking into account the total square footage and number of floors. At least one outdoor sample is collected for comparison.
  • Step 2 – Air Collection: Using a calibrated pump, we pull a controlled volume of air for generally around 5 minutes through a spore trap cassette.
  • Step 3 – Lab Submission: The sealed cassettes are sent to an accredited laboratory for analysis.
  • Step 4 – Reporting: Results are compiled into a detailed report showing spore counts, types present, and how they compare to outdoor levels.

Pros of Air Sampling

  • Detects hidden mold growth that may not be visible.
  • Helps assess indoor air quality concerns.
  • Provides a lab-certified baseline before and after remediation.
  • Quick and non-destructive.

Cons of Air Sampling

  • Represents only a “snapshot in time” — spore levels can fluctuate based on activity and conditions.
  • May not pinpoint the exact source of hidden mold without additional inspection.
  • Only collects aerosolized mold spores — if mold isn’t actively airborne during testing, it may not be detected.

Results & Turnaround Time

Most air sampling results are available within three business days, though expedited testing is possible if needed. The report will list spore counts by type, compare them to outdoor samples, and note whether elevated levels are present indoors.


Cost Expectations

For a typical two-story home of 1,600–2,000 square feet, a standard air sampling test often ranges from $450 to $750.
If you choose a comprehensive test — sampling every room in the home — costs can range from $950 to $1,350 for the same size property. Larger homes, or those with multiple HVAC zones, will cost more due to the number of samples needed.


The Bottom Line

Air sampling is one of the most effective ways to assess what you can’t see — airborne mold spores. Whether you’re concerned about your health, verifying a remediation job, or buying a home, it’s a valuable tool in determining if your indoor air is truly clean.

MSI has been providing professional mold testing since 1998, with over two decades of experience interpreting results and guiding property owners toward the right solutions.