When a fire breaks out in your home, the first priority is always safety and getting the flames under control. But what happens next—the cleanup—is just as critical. Unfortunately, many homeowners in Montgomery County are learning the hard way that not all fire restoration companies are created equal.
A True Story: What Went Wrong After a Dryer Fire
We recently helped a homeowner in Montgomery County who had experienced a small electrical fire caused by her dryer. Thankfully, the fire was quickly extinguished and didn’t require water to put out. But that didn’t mean her home was in the clear.
Shortly after the incident, a restoration company showed up at her door—likely tipped off by emergency scanner alerts used by companies that “fire chase.” They made big promises: quick turnaround, no headaches, and full smoke removal. What she got instead was a superficial cleaning, an overuse of air scrubbers, and sloppy paint jobs to cover up the damage.
At first glance, it might have seemed like the job was done. But the homeowner could still smell smoke—even months later.
That’s when she called MSI.
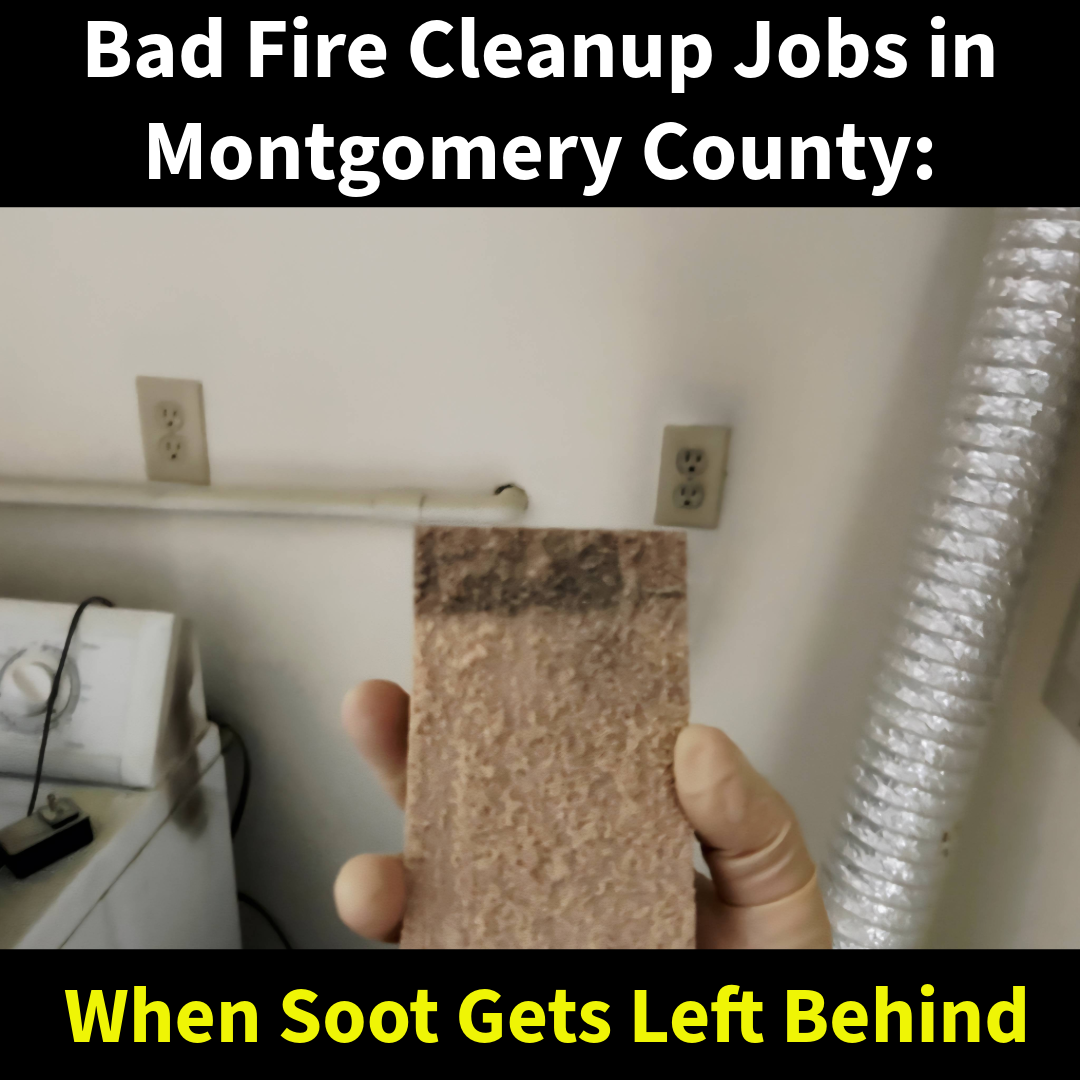
The Soot You Can’t See Is the Most Dangerous
When we arrived and conducted a proper inspection, it became clear the previous company had barely scratched the surface. Our team found soot residue throughout multiple areas of the home, including the HVAC system and ductwork—a huge red flag. Once soot settles into porous materials, the smell isn’t just a nuisance—it’s a sign that harmful particulates may still be lingering in your air and surfaces.
Worse yet, because the soot had now set into the building materials, full demolition and replacement of certain areas became necessary. Had the cleanup been done properly from the start, that extra damage—and extra cost—could have been avoided.
How Fire Damage Cleanup Should Be Done
At MSI, we don’t cut corners or rely on paint and promises. Here’s what proper fire and smoke remediation should include:
- Detailed Inspection – Not just what’s visible. We test air quality, inspect hidden cavities, and evaluate HVAC systems for contamination.
- HEPA Vacuuming and Chemical Cleaning – We use specialized cleaning agents that break down soot and smoke residues—not just cover them up.
- Odor Neutralization – We deploy hydroxyl generators and proven deodorization methods that eliminate odors at the molecular level.
- Clear Documentation – We photograph, document, and report every step of the process for insurance and peace of mind.
- Honest Evaluation – If demo is needed, we’ll tell you. If it can be cleaned, we’ll show you. No scare tactics, just real solutions.
The Takeaway: Don’t Let a Bad Cleanup Become a Bigger Disaster
In the restoration world, what you don’t see can cost you the most—especially when it comes to soot and smoke. If you’re dealing with the aftermath of a fire, don’t settle for surface-level fixes. Make sure the company you hire has the experience, equipment, and ethics to do it right.
At MSI, we’ve been restoring fire-damaged properties since 1998. We don’t chase fires—we answer calls from people who need help. And we never cut corners that put your health or property at risk.