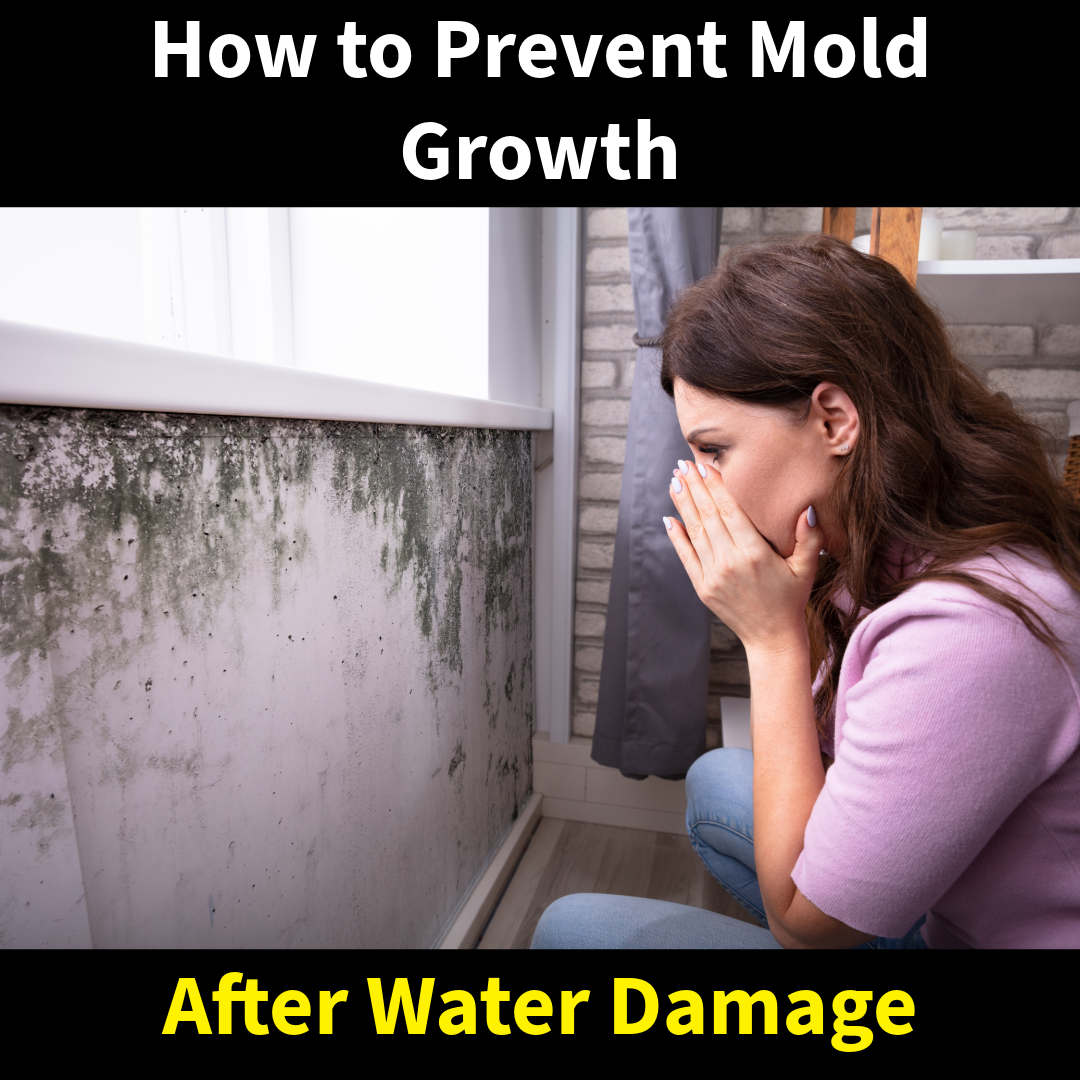
How to Prevent Mold Growth After Water Damage

Water damage can wreak havoc on your home, and one of its most persistent and hazardous consequences is mold growth. Mold can start growing within 24-48 hours after water exposure, causing health risks and structural damage if left unchecked. Fortunately, with prompt action and the right steps, you can prevent mold from taking hold in your home.

Here’s a comprehensive guide to preventing mold growth after water damage.

1. Act Fast: Time is Critical

Mold thrives in moist environments, so addressing water damage quickly is essential. The longer water sits, the more likely mold spores will spread and grow.

What to Do:

  • Begin water removal immediately.
  • Contact a professional restoration company if the damage is extensive.

2. Remove Standing Water

Standing water creates an ideal breeding ground for mold. Use tools like wet/dry vacuums, mops, and towels to remove as much water as possible.

Pro Tip: If the area is heavily flooded, call a professional for safe and efficient water extraction.

3. Dry the Area Thoroughly

Even after water is removed, damp materials and surfaces can still promote mold growth.

Steps to Take:

  • Use fans and dehumidifiers to speed up the drying process.
  • Open windows and doors to improve ventilation (weather permitting).
  • Remove soaked carpets, padding, and furniture to dry them separately.

Key Tip: Monitor humidity levels using a hygrometer. Keep indoor humidity below 50% to inhibit mold growth.

4. Dispose of Unsalvageable Items

Some materials are difficult to dry completely and may need to be discarded to prevent mold.

Items to Watch:

  • Water-damaged drywall and insulation.
  • Carpets and rugs soaked for over 24-48 hours.
  • Upholstered furniture and porous items like books or cardboard.

Pro Tip: Always follow local disposal regulations for damaged items.

5. Clean and Disinfect Affected Areas

Cleaning surfaces after water damage helps remove any mold spores that may have already settled.

What to Use:

  • A mix of detergent and water for general cleaning.
  • A solution of one cup of bleach to one gallon of water for hard surfaces (never mix bleach with ammonia or other cleaners).

Important: Wear protective gear, such as gloves and masks, when cleaning to avoid exposure to mold spores.

6. Inspect Hidden Areas

Mold often grows in hidden places, such as behind walls, under flooring, or in HVAC systems.

Key Areas to Check:

  • Inside wall cavities.
  • Underneath carpets and floorboards.
  • Behind large furniture or appliances.

Tip: If you suspect mold in hidden areas, consider hiring a professional for a thorough inspection.

7. Replace and Repair Damaged Materials

Some materials, like drywall, insulation, and wood, can retain moisture even after drying. Replacing them reduces the risk of future mold growth.

What to Replace:

  • Severely water-damaged drywall and insulation.
  • Warped wood or compromised structural materials.

8. Prevent Future Water Damage

The best way to combat mold is by stopping water damage before it starts.

Preventative Measures:

  • Fix leaky roofs, pipes, and appliances promptly.
  • Ensure gutters and downspouts direct water away from your home.
  • Seal windows, doors, and foundations to prevent water infiltration.

9. Use Mold-Resistant Products

When rebuilding after water damage, opt for mold-resistant materials to safeguard your home.

Options Include:

  • Mold-resistant drywall.
  • Mold-inhibiting paint.
  • Moisture-resistant flooring.

10. Call in the Professionals

If the water damage is extensive or mold growth has already begun, it’s best to consult experts. Professional restoration companies have the tools, training, and experience to safely and effectively handle water damage and mold prevention.

Benefits of Professional Help:

  • Industrial-grade drying and dehumidification equipment.
  • Specialized cleaning solutions and techniques.
  • Peace of mind knowing your home is safe and mold-free.

Why Mold Prevention Matters

Mold not only damages your home but can also pose significant health risks, including:

  • Respiratory problems.
  • Allergic reactions.
  • Aggravation of asthma symptoms.

Preventing mold growth after water damage protects both your property and your family’s health.

We’re Here to Help

Dealing with water damage can be overwhelming, but you don’t have to face it alone. At Mold Solutions & Inspections, we specialize in water damage restoration and mold prevention, offering fast and effective solutions to protect your home.

Contact us today for expert assistance, and let us restore your home to its original condition—mold-free and safe!

Winter Preparedness For Your Home or Business

As winter settles in, homeowners and businesses face unique challenges. From freezing pipes to poor ventilation causing mold growth, the cold season can take a toll on your property. At Mold Solutions & Inspections, we understand the importance of staying ahead of these risks to avoid costly repairs and health hazards.

Protecting Against Water Damage

One of the biggest winter threats is water damage caused by frozen pipes or ice dams. Here’s how to stay protected:

  • Insulate Pipes: Wrap exposed pipes in basements, crawl spaces, and attics to prevent freezing.
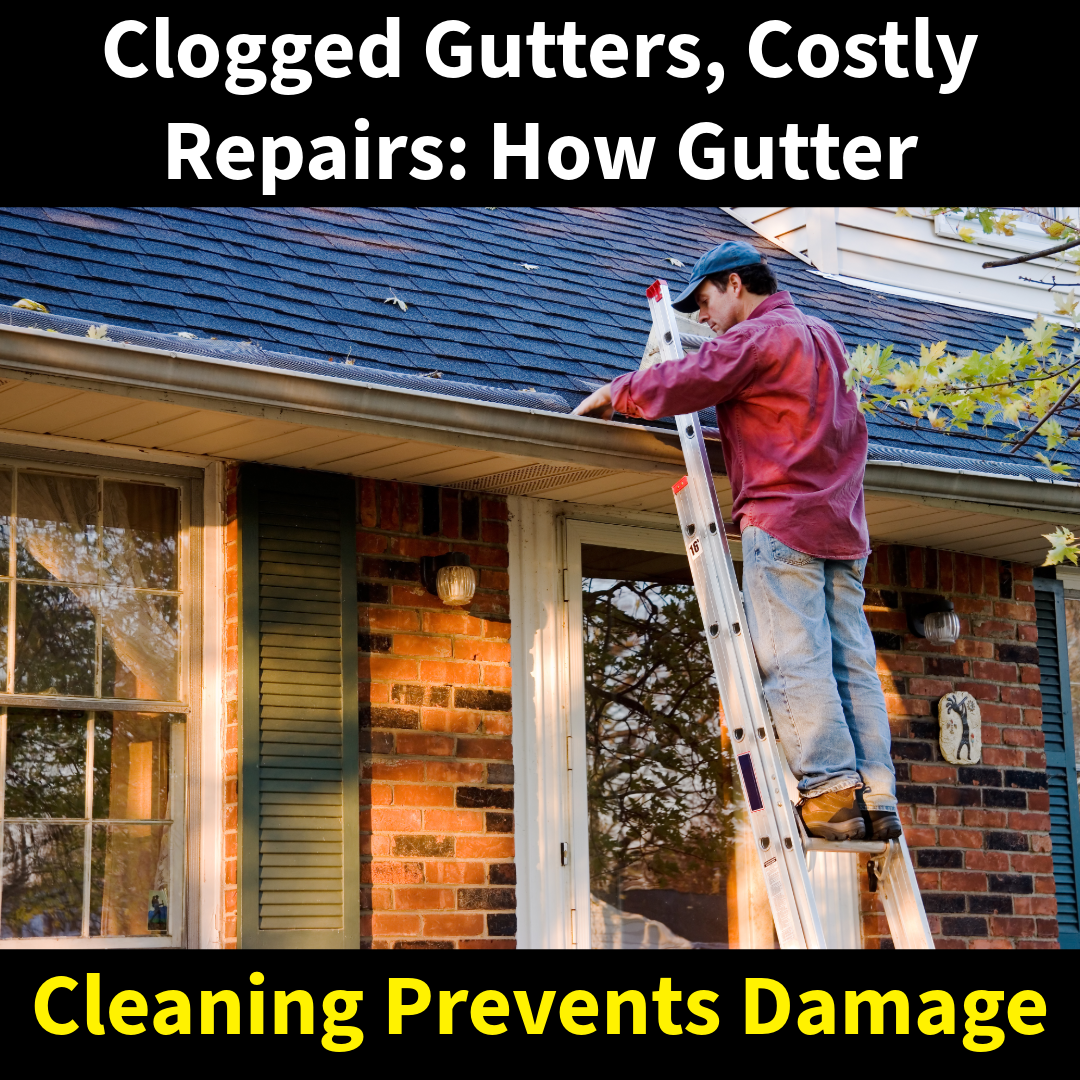
  • Clear Gutters and Downspouts: Blockages can lead to ice dams, which cause water to seep into walls and ceilings.
  • Check for Leaks: Inspect windows, doors, and roofs for potential entry points for water.

If water damage does occur, our team at Mold Solutions & Inspections offers 24/7 water damage restoration services to minimize disruption.

Preventing Fire Hazards

Winter also brings an increased risk of fire hazards, especially with heating equipment. Stay safe by:

  • Using Space Heaters Safely: Keep heaters away from flammable materials and never leave them unattended.
  • Cleaning Chimneys and HVAC Systems: Built-up debris can ignite and cause house fires.
  • Inspecting Holiday Decorations: Overloaded electrical outlets or frayed wires from holiday lights can spark fires.

In the unfortunate event of fire damage, we specialize in fire and smoke cleaning to restore your property quickly.

Addressing Mold and Air Quality Concerns

Winter often means closed windows and poor ventilation, which can lead to mold growth and unhealthy indoor air quality. Combat these issues by:

  • Controlling Humidity: Use dehumidifiers in basements, crawl spaces, and poorly ventilated areas.
  • Inspecting for Mold: Look out for musty odors or visible mold, especially after water damage.
  • Scheduling Mold Testing: If you suspect mold, our expert team can conduct thorough testing and provide solutions.

Remember, untreated mold can affect not only your property but also your health. Mold Solutions & Inspections offers professional mold testing and remediation to keep your home or business safe.

Be Ready for Emergencies

Despite the best precautions, disasters can strike. That’s why having a reliable partner like Mold Solutions & Inspections is crucial. We offer services like:

  • Water Damage Restoration
  • Fire and Smoke Cleaning
  • Biohazard Cleanup
  • Crime and Trauma Scene Cleanup
  • Asbestos Testing

Conclusion

Winter doesn’t have to be a season of worry. By taking proactive steps to protect your property and partnering with experts like Mold Solutions & Inspections, you can ensure a safer, hassle-free season. If you need assistance or want to schedule an inspection, contact us today. Let us help you weather the winter without worry!

Top 10 Signs of Water Damage in Your Home

Water damage can be sneaky, often hiding in plain sight and causing extensive issues if left untreated. Recognizing the early signs is essential to prevent costly repairs and maintain the safety and value of your home. Here are the top 10 signs of water damage that every homeowner should know:

1. Water Stains on Walls or Ceilings

Discolored patches on walls or ceilings, often yellow or brown, are classic signs of water damage. These stains indicate that water has seeped through and dried, leaving behind minerals and residues.

What to Do: Check above or behind the stain for leaks, such as a damaged roof or plumbing issue.

2. Peeling or Bubbling Paint and Wallpaper

Water behind walls can cause paint or wallpaper to lose adhesion, leading to peeling, bubbling, or warping.

What to Do: Remove the affected material to inspect the underlying wall for moisture and damage.

3. Warped or Swollen Flooring

Hardwood, laminate, or tile floors that buckle, crack, or swell are clear indicators of water intrusion. This often happens when water seeps under the flooring and causes the materials to expand or weaken.

What to Do: Investigate nearby water sources like plumbing or appliances for leaks.

4. A Musty or Damp Odor

A persistent musty smell often signals hidden water damage, especially if mold or mildew is present. Basements, attics, and areas with poor ventilation are common culprits.

What to Do: Look for damp surfaces and mold growth. Use a dehumidifier to reduce moisture levels while addressing the source of the smell.

5. Mold Growth

Mold thrives in moist environments and can appear as dark spots or fuzzy patches on walls, ceilings, floors, or even furniture. It’s a strong indication of excessive moisture.

What to Do: Mold remediation is essential. Depending on the extent of growth, you may need professional help to remove it safely.

6. Increased Water Bills

An unexplained spike in your water bill could indicate a hidden leak somewhere in your plumbing system. Even small leaks can waste significant water over time.

What to Do: Inspect your plumbing fixtures and pipes for signs of dripping or pooling water.

7. Cracks in Walls or Foundations

Water can seep into foundation cracks, expanding them over time and potentially weakening the structure of your home. Look for new or worsening cracks in walls, ceilings, or basement floors.

What to Do: Seal the cracks and ensure proper drainage around your home to prevent water pooling near the foundation.

8. Sagging Ceilings or Walls

A ceiling or wall that appears to sag or bulge may have water trapped behind it. This can pose a safety risk as the structure weakens over time.

What to Do: Act quickly to drain the water and repair the structural damage before it worsens.

9. Dripping or Pooled Water

Visible water is the most obvious sign of water damage. Check for puddles near appliances, plumbing, windows, or doors.

What to Do: Clean up the water immediately and locate the source to prevent further damage.

10. Rust or Corrosion

Metal components, like pipes, water heaters, or fixtures, may show signs of rust or corrosion when exposed to moisture over time. This is often a sign of ongoing leaks.

What to Do: Repair or replace the affected components and address the underlying moisture problem.

Why Addressing Water Damage is Critical

Ignoring water damage can lead to:

  • Structural issues like weakened walls, floors, or foundations.
  • Mold growth, which poses health risks.
  • Expensive repairs as the damage spreads.

Call the Experts

If you notice any of these signs, don’t wait! Water damage can escalate quickly, leading to more extensive repairs and higher costs. At Mold Solutions & Inspections, we specialize in water damage restoration, offering fast and effective solutions to protect your home.

Contact us today for a free consultation or to set up an onsite inspection. Your home deserves the best care—let us help you restore it to its original condition.

How to Choose the Right Water Damage Restoration Company

When facing water damage in your home, selecting the right restoration company is crucial for effective recovery and peace of mind. With numerous options available, it can be overwhelming to determine which company will best meet your needs. Here are essential tips to help you make an informed decision when choosing a water damage restoration company.

1. Make Sure Their Licensed, Insured and Certified

Start by ensuring the restoration company is licensed, insured and certified. Certifications from organizations like the Institute of Inspection, Cleaning and Restoration Certification (IICRC) indicate that the company adheres to industry standards and best practices. A licensed and insured contractor is an absolute must, and the appropriate insurance and workman’s comp policy should also be required.

2. Check Experience and Reputation

Experience matters in water damage restoration. Look for a company with a proven track record in handling water damage situations. Research online reviews and testimonials to gauge customer satisfaction. Word-of-mouth recommendations from friends or family can also provide valuable insights.

3. Evaluate Their Response Time

Water damage can worsen rapidly, so prompt response is critical. Choose a company that offers 24/7 emergency services to ensure they can respond quickly when you need them most. A rapid response can significantly mitigate damage and reduce restoration costs.

4. Assess Their Equipment and Techniques

A reputable restoration company should use modern, industry-standard equipment and techniques for water extraction, drying, and restoration. Inquire about their drying methods, as advanced techniques like thermal imaging and dehumidification are essential for thorough restoration.

5. Inquire About Their Restoration Process

Understanding the company’s restoration process is essential. Ask about their steps for assessing damage, removing water, drying affected areas, and repairing any damage. A thorough and systematic approach will help ensure comprehensive restoration.

6. Check for Additional Services

Some restoration companies offer additional services, such as mold remediation, sewage cleanup, or reconstruction. If you anticipate needing these services, choose a company that can handle multiple aspects of restoration, saving you the hassle of hiring multiple contractors.

Choosing the right water damage restoration company can make a significant difference in the recovery process. By considering factors such as certification, experience, response time, and equipment, you can select a company that meets your needs and restores your home effectively. If you find yourself in need of water damage restoration, take the time to research and ask the right questions to ensure a successful recovery.

Top 5 Causes of Water Damage and How to Prevent Them

Water damage is a serious issue that can lead to costly repairs and long-term problems for homeowners. Understanding the common causes of water damage and how to prevent them is crucial for maintaining a safe and dry home. In this post, we’ll explore the top five causes of water damage and provide practical prevention tips.

1. Leaky Roofs

Cause: A damaged or aging roof can lead to leaks, allowing rainwater to seep into your home. This can cause extensive damage to ceilings, walls, and insulation.

Prevention: Regularly inspect your roof for missing shingles or signs of wear. Schedule professional roof inspections and maintenance, especially after severe weather.

2. Burst Pipes

Cause: Frozen, corroded, or poorly insulated pipes can burst, leading to significant water damage. This is particularly common in older homes during cold winter months.

Prevention: Insulate pipes in unheated areas, keep the heat on during cold spells, and regularly check for signs of leaks. Knowing the location of your main water shut-off valve can help minimize damage in an emergency.

3. Flooding from Heavy Rain

Cause: Heavy rainfall can overwhelm drainage systems, leading to flooding in basements and crawl spaces.

Prevention: Ensure your property has proper drainage systems, such as gutters and downspouts, that direct water away from your foundation. Consider installing a sump pump in high-risk areas.

4. Appliance Malfunctions

Cause: Washing machines, dishwashers, and water heaters can malfunction and leak, causing water damage to nearby areas.

Prevention: Regularly inspect and maintain appliances. Replace old hoses and fittings, and consider using appliance leak detectors that alert you to leaks before they cause damage.

5. Sewage Backup

Cause: A backup in your sewage system can lead to significant water damage and health risks.

Prevention: Be mindful of what goes down your drains and toilets. Regularly inspect your plumbing for blockages, and consider installing a backwater valve to prevent sewage from backing up into your home.

Conclusion

By understanding these common causes of water damage and taking proactive steps to prevent them, homeowners can protect their properties and save themselves from costly repairs. Knowing the types of water damage can also help you in finding the right water damage restoration company to handle the drying process. A good water damage restoration company will be able to mitigate the damage so mold doesn’t grow, whilst working with your insurance company if you’re filing a claim. Ask any water damage restoration company you’re interviewing for their certifications, license and insurance info before hiring them, so you’ll know you’re safe in the event of an additional loss.

The Dangers of Delaying Water Damage Restoration

Water damage can occur unexpectedly, whether from a burst pipe, heavy rainfall, or an appliance failure. While it may be tempting to postpone restoration efforts, delaying can lead to serious consequences. In this blog, we’ll explore the dangers of waiting too long to address water damage and why immediate action is essential for homeowners.

1. Increased Structural Damage

One of the most immediate risks of delaying water damage restoration is the potential for increased structural damage. Water can weaken walls, floors, and ceilings, leading to buckling, warping, or even collapse. The longer water remains, the more extensive and costly the repairs will be.

2. Mold Growth

Mold can begin to grow within 24 to 48 hours after water exposure. Once mold takes hold, it can spread rapidly and become difficult to eliminate. Not only can mold damage your property, but it can also pose serious health risks, including respiratory issues, allergies, and other health problems. Prompt restoration helps mitigate the risk of mold development.

3. Unpleasant Odors

Lingering water can lead to musty odors in your home, making it uncomfortable for you and your family. These odors can seep into furnishings, carpets, and walls, making them difficult to remove even after the water is gone. Immediate restoration helps eliminate moisture and prevent unpleasant smells from taking hold.

4. Increased Repair Costs

Delaying restoration can lead to more extensive damage, ultimately resulting in higher repair costs. What might have started as a minor leak could escalate into a major problem if left unattended. Acting quickly can save you time, money, and hassle in the long run.

5. Compromised Indoor Air Quality

Excess moisture in your home can lead to poor indoor air quality, exacerbating allergies and respiratory problems. Contaminants from water damage, such as mold spores and bacteria, can circulate in the air, affecting your family’s health. Swift restoration can help ensure a healthier living environment.

6. Potential for Sewage Contamination

If the water damage is caused by a sewage backup, delaying restoration can pose serious health risks. Sewage water contains harmful pathogens and bacteria that can lead to serious illness. Immediate action is necessary to ensure safe and effective cleanup and sanitization.

7. Potential Claim Denials

Not exercising a prompt response to your water loss can lead to a claim being denied for negligence and dwell time. In order to show the insurance company you took he necessary steps to protect your property, they must see action. Allowing water to sit will only increase the chance of mold growth and thusly give the insurance company the right to deny the claim because of dwell time.

The dangers of delaying water damage restoration are significant and far-reaching. From structural damage and mold growth to health risks and increased repair costs, acting quickly is crucial for protecting your home and family. If you experience water damage, don’t wait—contact a professional restoration company to address the situation promptly and effectively.

Mold and Allergies: What You Need to Know

Mold is a common household issue that can significantly impact indoor air quality and, for many, trigger allergic reactions. Understanding the connection between mold and allergies is crucial for maintaining a healthy living environment.

What is Mold?

Mold is a type of fungus that thrives in damp, warm conditions. It reproduces by releasing spores into the air, which can easily spread throughout a home. While some molds are harmless, others can produce allergens and irritants that affect sensitive individuals.

How Does Mold Affect Allergies?

For those with mold allergies, exposure can lead to a range of symptoms, including:

  • Sneezing
  • Runny or stuffy nose
  • Itchy or watery eyes
  • Coughing
  • Skin rashes

In some cases, exposure can also exacerbate asthma symptoms, making it difficult to breathe.

Common Sources of Mold

Mold can grow in various places around the home, particularly in areas with high humidity or moisture. Common sources include:

  • Bathrooms
  • Basements
  • Kitchens
  • Areas with water leaks or flooding

Prevention and Control

To minimize mold growth and its effects on allergies, consider these preventive measures:

  1. Maintain Humidity Levels: Keep indoor humidity below 50% by using dehumidifiers and proper ventilation.
  2. Fix Leaks Promptly: Address any leaks in plumbing or roofing to prevent moisture accumulation.
  3. Clean Regularly: Regular cleaning of surfaces, especially in bathrooms and kitchens, can help prevent mold buildup.
  4. Use Mold-Resistant Products: Consider mold-resistant paints and building materials, particularly in high-moisture areas.

When to Seek Help

If you notice significant mold growth or experience persistent allergy symptoms, it may be time to consult a professional. A comprehensive mold test can lead to discovery of the issue and identify the type of mold which will then aid in finding the origin. Mold remediation experts can assess the situation and safely remove mold, ensuring your home is a healthy space. Having mold remediation completed improperly can lead to cross contamination and only exacerbate the issue, so doing your due diligence by finding a qualified mold removal contractor can save you time and money while also limiting your exposure to mold.

Why Sewer Pipes Break

Sewer pipes play a crucial role in our plumbing systems, transporting wastewater away from our homes and businesses. However, these underground pipes are not immune to damage. Cracks in sewer pipes can lead to significant problems, including leaks, blockages, and costly water damage restoration. In this blog, we’ll explore the main reasons why sewer pipes crack and what homeowners can do to prevent these issues.

Age and Wear

One of the most common reasons sewer pipes crack is simply due to age. Most sewer pipes have a lifespan of 50 to 100 years, depending on the material. Over time, natural wear and tear can weaken the pipe walls, making them more susceptible to cracking. Older pipes made from materials like clay or cast iron are particularly vulnerable.

Soil Movement

Soil movement is another significant factor that can lead to cracked sewer pipes. Changes in soil composition, settling, or erosion can put pressure on pipes, especially if they are installed too shallowly. Additionally, tree roots can grow into pipes, exerting pressure and causing cracks or blockages.

Improper Installation

If sewer pipes are not installed correctly, they can be prone to damage. Poorly aligned pipes, inadequate support, or improper backfilling can lead to stress and cracking over time. It’s crucial to have professional installation to ensure pipes are laid at the right depth and angle.

Extreme Weather Conditions

Extreme weather, such as heavy rain, freezing temperatures, and prolonged drought, can impact the integrity of sewer pipes. Heavy rain can saturate the soil, leading to erosion and shifting, while freezing temperatures can cause the ground to expand and contract, putting pressure on the pipes.

Corrosion

Certain materials, especially metal pipes, can corrode over time. Factors such as soil acidity, moisture, and chemical exposure can accelerate corrosion, weakening the pipe structure and leading to cracks. Regular inspections can help identify corrosion early and prevent further damage.

Blockages

Blockages caused by grease buildup, flushable wipes, foreign objects, or tree roots can increase pressure within sewer pipes, leading to cracks. When wastewater cannot flow freely, it creates stress on the pipe walls, which can ultimately result in damage.

Groundwater Pressure

In areas with high groundwater levels, the pressure from surrounding soil and water can impact sewer pipes. Excessive groundwater pressure can lead to cracks and even cause pipes to collapse if they are not designed to withstand such forces.

Consequences of Cracked Sewer Pipes

Cracked sewer pipes can lead to a range of issues, including:

  • Leaks: Wastewater can leak into the surrounding soil, potentially contaminating groundwater and harming local ecosystems.
  • Odors: Cracks can allow sewer gases to escape, leading to unpleasant odors inside and outside your home.
  • Blockages: Cracks can attract debris and roots, leading to clogs that can back up the entire plumbing system.
  • Costly Repairs: Sewer backups lead to black water floods which can be costly, and wreak havoc on your home, destroying personal contents and your structure. Always consult a water damage restoration specialist when dealing with sewer backups.

Preventive Measures

To minimize the risk of cracked sewer pipes, homeowners should consider the following preventive measures:

  • Regular Inspections: Schedule periodic plumbing inspections to identify potential issues before they escalate.
  • Proper Landscaping: Avoid planting trees or large shrubs near sewer lines, as roots can infiltrate and damage pipes.
  • Maintain Drainage: Ensure proper drainage around your property to reduce soil movement and erosion.
  • Avoid Chemical Drain Cleaners: These can corrode pipes over time, leading to weakened structures.

Understanding why sewer pipes crack is essential for every homeowner. By being aware of the causes and taking preventive measures, you can help ensure the longevity of your plumbing system and avoid the costly consequences of sewer pipe damage. If you suspect a problem with your sewer pipes, don’t hesitate to contact a professional plumber for an inspection and repair. If you have a sewer backup that has caused flooding, this type of loss should be handled by a water damage restoration professional, as the water itself is highly contaminated.

Waterproof Flooring: What You Need to Know

When it comes to choosing flooring for your home, especially in areas prone to moisture like kitchens, bathrooms, and basements, waterproof flooring stands out as an essential consideration. Waterproof flooring not only protects your home from water damage but also offers durability, ease of maintenance, and aesthetic appeal. If you’re considering an upgrade or a new installation, here’s everything you need to know about waterproof flooring.

Why Choose Waterproof Flooring?

  1. Protection Against Water Damage: Waterproof flooring is designed to withstand spills, splashes, and even minor floods without warping, buckling, or staining. This is particularly valuable in high-moisture areas like bathrooms, kitchens, and basements where traditional flooring options might struggle.
  2. Durability and Longevity: Many waterproof flooring options are incredibly durable and can handle heavy foot traffic, making them ideal for both residential and commercial spaces. They often come with warranties that guarantee their performance and longevity.
  3. Ease of Maintenance: Waterproof floors are generally easy to clean and maintain. They resist stains and are often less susceptible to damage from spills or accidents. Regular sweeping and occasional mopping are usually all that’s needed to keep them looking new.
  4. Variety of Styles: Advances in flooring technology have led to a wide range of styles and finishes in waterproof flooring. From luxurious vinyl planks to elegant laminate, you can find options that mimic the look of natural wood or stone, fitting seamlessly with your home’s décor.

Types of Waterproof Flooring

  1. Luxury Vinyl Plank (LVP) and Luxury Vinyl Tile (LVT): Luxury vinyl is one of the most popular choices for waterproof flooring due to its high durability and variety of styles. LVP and LVT come in various designs, including wood and stone looks, and are both resistant to water and scratches. They often feature a click-lock installation system, making them a favorite among DIY enthusiasts.
  2. Waterproof Laminate Flooring: Traditionally, laminate flooring wasn’t the best choice for wet areas due to its susceptibility to moisture. However, waterproof laminate has evolved with a specially designed core that resists water damage. It offers the appearance of natural wood or stone at a more affordable price point.
  3. Ceramic and Porcelain Tile: Ceramic and porcelain tiles are naturally water-resistant, making them an excellent choice for areas with high moisture. They are available in countless designs, sizes, and colors. While they can be cold and hard underfoot, adding area rugs can provide comfort.
  4. Engineered Hardwood with Waterproof Finish: Engineered hardwood floors are made from a layer of real wood over a plywood base. When treated with a waterproof finish, these floors offer a combination of natural wood aesthetics and water resistance. They are suitable for areas with occasional moisture but may not be ideal for consistently wet environments.
  5. Rubber Flooring: Rubber flooring is a versatile option that offers waterproof qualities, along with excellent slip resistance and durability. It’s commonly used in commercial settings but can also be a practical choice for home gyms and playrooms.

Benefits of Waterproof Flooring

  1. Prevents Mold and Mildew: Waterproof flooring helps prevent the growth of mold and mildew by keeping moisture from seeping into the subfloor. This is particularly beneficial in areas prone to humidity and dampness.
  2. Enhances Home Value: Installing high-quality waterproof flooring can enhance your home’s value by offering potential buyers a feature that adds both function and aesthetics. It’s a practical upgrade that can set your home apart from others on the market.
  3. Increases Comfort: Many waterproof flooring options offer added comfort compared to traditional materials. For instance, luxury vinyl planks can have a softer, warmer feel underfoot, making them more comfortable for standing or walking.
  4. Eco-Friendly Options: Some waterproof flooring materials, such as certain types of luxury vinyl and engineered wood, are available in eco-friendly versions. These options often use recycled materials or sustainable production practices, helping you make an environmentally conscious choice.

Condensation on Duct Work

Condensation occurs when air is cooled below its dew point temperature. The study of air containing moisture (or plain old air as we know it) is called psychrometrics (pronounced si-crow-met-ricks), and deals with the relationships between temperature, relative humidity, absolute humidity, dew point and several other properties of the air/moisture mixture. A basic psychrometric relationship is that air can only hold so much moisture at a certain temperature. When the air is full of moisture, the relative humidity is 100%. When the air contains half as much moisture as is can at a temperature, the air is at 50% relative humidity. The next relationship is that if you cool the air, the relative humidity increases. (Cool air can’t hold as much moisture as warm air) At some point, the air becomes saturated. Cooling it any further causes condensation. This is the dew point.

So how does this relate to sweating ducts? Air conditioners make air cold. The cold air is forced through ducts. As a result, the outside surface of the ducts is cooled. If the air outside the ducts is humid enough, condensation will form on the ducts. The colder the air in the ducts and the more humid the air around the ducts, the more chance of forming condensation. Note that sweating ducts has nothing to do with moisture in the air inside the ducts. Solutions to sweating ducts involve 1) warming the surface, and 2) drying the air around the ducts. Insulation is added to the exterior of ducts to help warm the duct surface. The insulation should be enclosed in a vapor barrier to keep moisture from moving through the insulation itself. Joints in the ducts, insulation and vapor barrier should be sealed. The insulation and vapor barrier should extend completely to the registers, or condensation can form on the exposed ends.

If the ducts are in a crawlspace, a complete vapor barrier on the soil is an essential first step. Increasing crawlspace ventilation may help in some parts of the country, but be careful because increasing ventilation in other areas can actually increase the condensation. In basements and crawlspaces, sometimes adding a dehumidifier is necessary. Most duct condensation issues I have seen are the result of problems with duct insulation. In some cases, fixing the insulation solves the problem. Adding insulation typically does not solve the problem. In cases where the insulation is in good shape, crawlspaces and basements have been wet, or ducts have been pressed together.

When is the air conditioner at fault? Some newer air conditioning systems and controls actually make the air inside the ducts colder. This is an attempt by the manufacturer to help make the air in the house dryer, but often causes more condensation on the outside of ducts. Dirty filters can restrict air flow through the system, resulting in colder air. This is the easiest one to deal with: keep your filters clean. Otherwise, make sure the duct insulation and vapor barrier are continuous, contiguous and complete. And keep the air around ducts dry by covering exposed soil in crawlspaces, keeping ducts apart, and reducing other moisture sources in the air as much as possible.