How to Prevent and Address Water Damage During Freezing Winter Temperatures

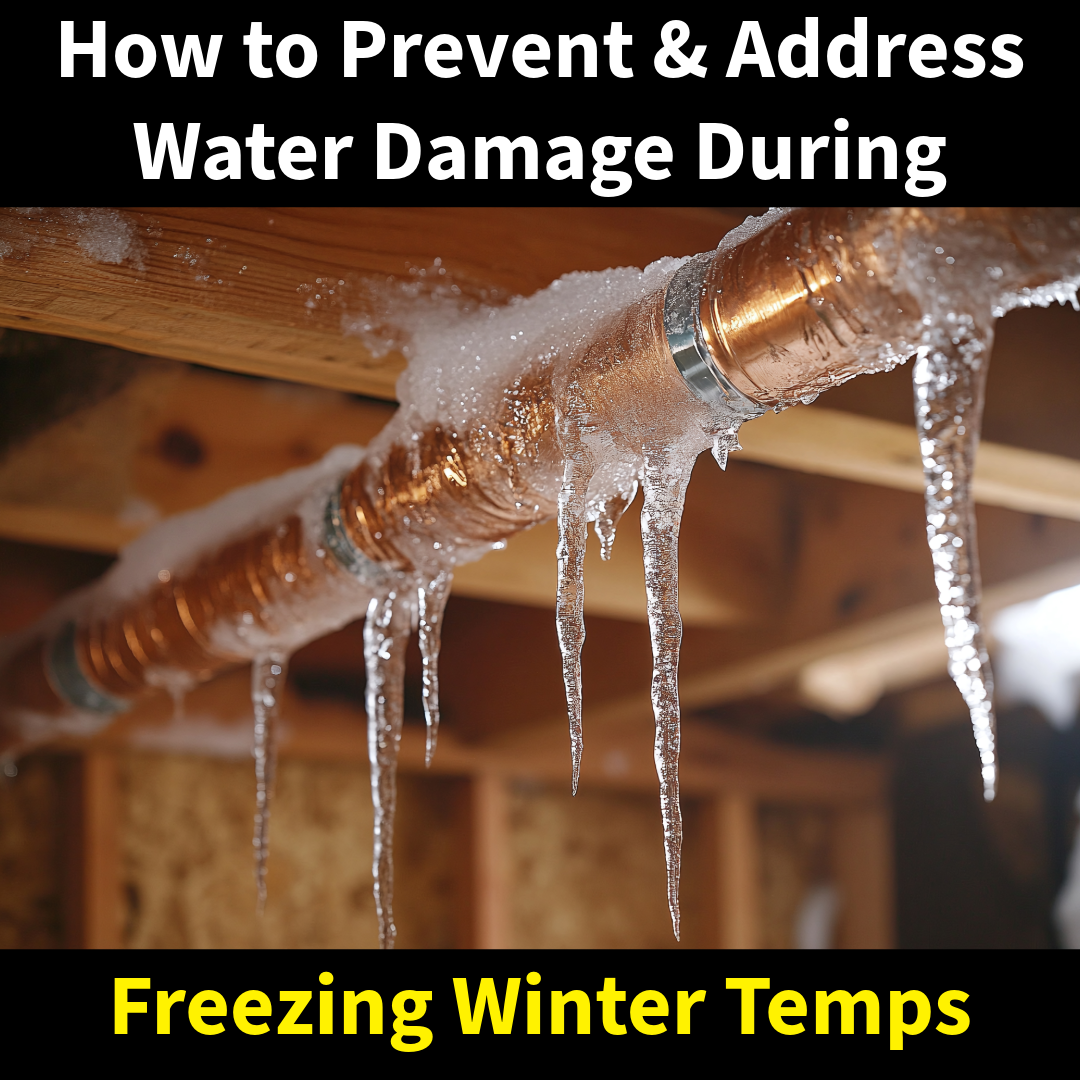
Winter brings freezing temperatures, and while the snowy landscapes can be picturesque, the risk of water damage increases significantly during this time. Burst pipes, ice dams, and other weather-related issues can wreak havoc on homes and businesses. In this blog, we’ll explore practical ways to prevent water damage and discuss what to do if it occurs.

Common Causes of Water Damage in Freezing Temperatures

  1. Frozen and Burst Pipes When temperatures drop, water inside pipes can freeze and expand, causing pipes to crack or burst. This can lead to significant water damage once the ice thaws and water begins to flow again.
  2. Ice Dams Ice dams form when snow on the roof melts and refreezes near the edges, preventing proper drainage. The trapped water can seep under shingles and into your home, causing leaks and water damage.
  3. Blocked Gutters Gutters clogged with debris can cause water to back up and freeze, leading to ice dams and water overflow that can damage walls, ceilings, and foundations.
  4. Foundation Cracks Water that seeps into small foundation cracks can freeze and expand, worsening the cracks and potentially causing flooding in basements or crawlspaces.

Tips to Prevent Water Damage During Freezing Temperatures

  1. Insulate Pipes Use foam insulation or pipe sleeves to keep exposed pipes warm, especially in unheated areas like basements, attics, and garages.
  2. Maintain Indoor Temperatures Keep your thermostat set to at least 55°F, even if you’re away. Consistent heating prevents pipes from freezing.
  3. Seal Cracks and Leaks Inspect your home for drafts or leaks near windows, doors, and walls. Use caulk or weather stripping to seal these areas.
  4. Clean Gutters Regularly Remove leaves, twigs, and debris from gutters to ensure proper drainage and prevent ice buildup.
  5. Allow Faucets to Drip During extreme cold, let faucets drip slightly to keep water moving and reduce the risk of freezing in the pipes.
  6. Inspect Your Roof Ensure your roof is in good condition and address any missing shingles or weak spots before winter sets in. This helps prevent ice dams.

What to Do if Water Damage Occurs

If you experience water damage during freezing temperatures, act quickly to minimize damage:

  1. Shut Off the Water Supply Locate and turn off the main water valve to prevent further flooding.
  2. Remove Excess Water Use towels, mops, or a wet/dry vacuum to remove standing water. Avoid using regular household vacuums for this task.
  3. Call a Professional Water Damage Restoration Service Mold Solutions & Inspections specializes in water damage restoration and can quickly assess the damage, remove water, and begin the drying and restoration process.
  4. Document the Damage Take photos and videos of the affected areas for insurance purposes. Notify your insurance provider promptly.
  5. Monitor for Mold Growth Water damage can lead to mold growth within 24-48 hours. A professional inspection can help identify and address mold issues early.

Why Choose Mold Solutions & Inspections for Water Damage Restoration

At Mold Solutions & Inspections, we understand how overwhelming water damage can be, especially during freezing winter months. Our experienced team is on-call 24 hours a day and uses advanced equipment and techniques to:

  • Quickly remove water and dry affected areas.
  • Prevent secondary damage like mold growth.
  • Restore your home or business to its original condition.

Don’t let freezing temperatures disrupt your peace of mind. Contact us today for expert water damage restoration services. We’re here to help you stay safe and dry all winter long!

How Mold and Water Damage Can Affect Legal Disputes in Real Estate

When it comes to real estate transactions, unforeseen issues like mold and water damage can significantly complicate matters. These problems not only impact the value and safety of a property but also often lead to legal disputes between buyers, sellers, landlords, tenants, or even contractors. Understanding the legal implications of mold and water damage and knowing how professional expertise can support these cases is crucial for resolving disputes effectively.

The Role of Mold in Legal Disputes

Mold growth in a property can become a major source of contention in real estate deals. Here are some common scenarios where mold can lead to legal disputes:

  1. Disclosure Failures
    • Sellers are typically required to disclose known issues with a property, including mold. If a buyer discovers mold after the sale and believes it was hidden or not disclosed, it could result in lawsuits for fraud or breach of contract.
  2. Landlord-Tenant Disputes
    • Tenants may file claims against landlords if mold makes a property uninhabitable or causes health issues. This is particularly true if the landlord failed to address water leaks or humidity problems that led to the mold growth.
  3. Construction and Renovation Claims
    • Faulty construction or poor ventilation systems can lead to mold issues. In such cases, lawsuits may arise against builders or contractors for negligence.

Water Damage and Legal Challenges

Water damage often precedes mold growth and can lead to structural issues, electrical hazards, and other significant problems. The legal ramifications of water damage include:

  1. Failure to Mitigate
    • Property owners have a responsibility to address water damage promptly. Failure to do so can lead to disputes over who is liable for resulting damages, especially in cases involving shared properties or multi-unit buildings.
  2. Insurance Disputes
    • Many homeowners and property insurance policies have specific clauses regarding water damage. Disputes may arise over whether the damage was sudden and accidental or due to long-term neglect, impacting claim payouts.
  3. Disputes Over Repairs
    • Buyers or tenants might argue that repairs were insufficient or improperly executed, leading to further damage or health concerns.

The Importance of Expert Testimony

Mold and water damage cases often require expert testimony to establish liability and damages. Here’s how our expertise at Mold Solutions & Inspections can support legal disputes:

  1. Accurate Assessment
    • Our team provides thorough mold and water damage inspections, offering detailed reports that can be used as evidence in court. These reports identify the extent of damage, causes, and remediation needs.
  2. Health and Safety Impacts
    • We can highlight how mold or water damage affects indoor air quality and occupant health, which can strengthen claims related to uninhabitable conditions or negligence.
  3. Clear Documentation
    • Detailed documentation of our testing and remediation processes can help clarify timelines, responsibilities, and whether appropriate actions were taken to resolve the issue.
  4. Expert Witness Services
    • Our experts can serve as witnesses, providing professional opinions on mold and water damage causes, prevention, and remediation standards. This adds credibility to legal arguments.

Preventative Steps to Avoid Legal Issues

To minimize the risk of disputes, property owners and stakeholders should:

  • Conduct professional mold and water damage inspections before buying, selling, or renting properties.
  • Promptly address any signs of leaks, flooding, or humidity issues.
  • Keep clear records of maintenance, repairs, and inspections.
  • Use trusted professionals for remediation and testing.

Conclusion

Mold and water damage are not just property concerns—they are often at the center of complex legal disputes in real estate. By understanding these challenges and leveraging the expertise of a professional restoration company like Mold Solutions & Inspections, you can navigate these cases effectively and achieve better outcomes. Whether you’re a buyer, seller, landlord, or tenant, having the right experts on your side can make all the difference.

Need help with mold testing, water damage restoration, or expert testimony for a legal case? Contact us today to learn how we can assist you.

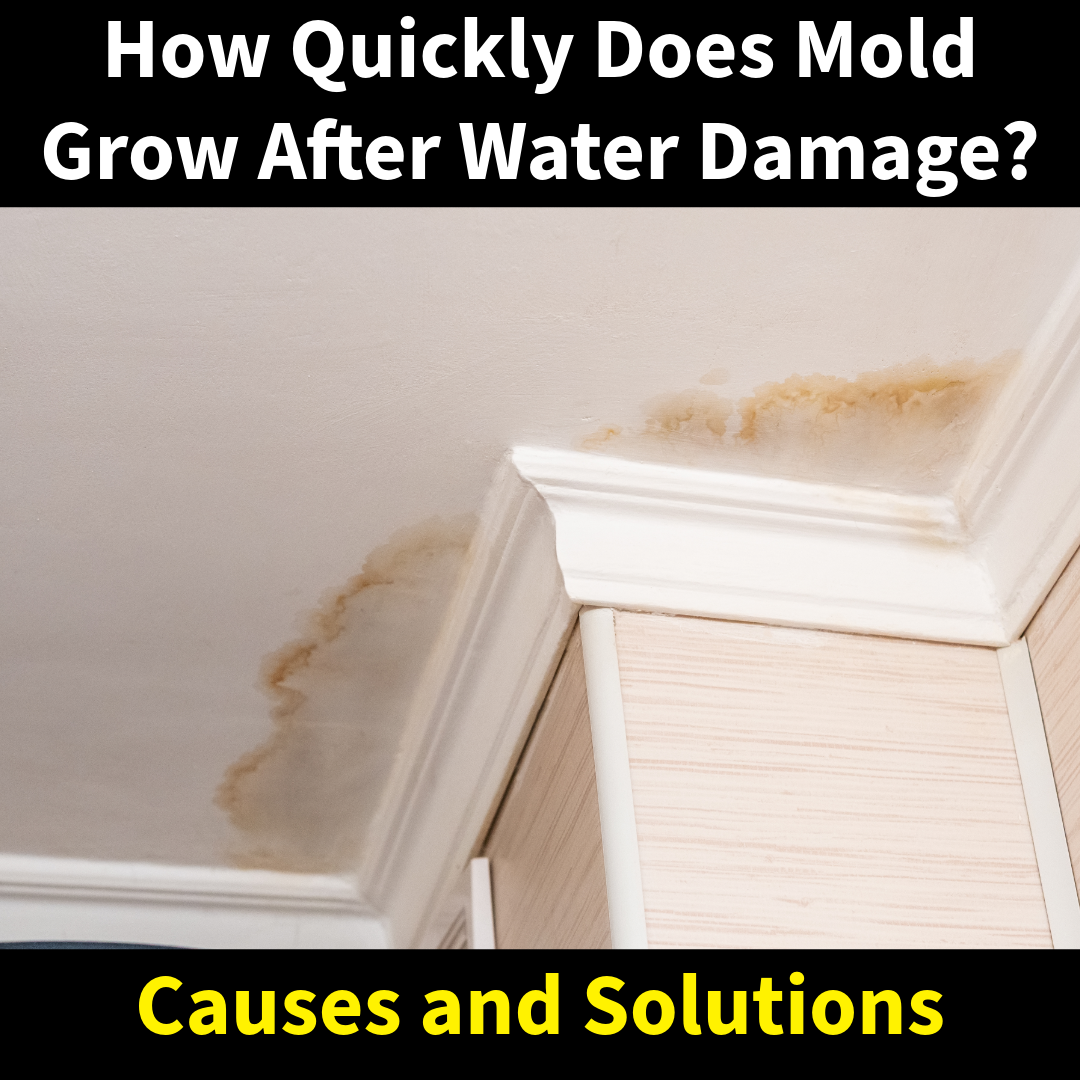
How Quickly Does Mold Grow After Water Damage?

Water damage can be an overwhelming experience for any property owner. Beyond the immediate damage to your belongings and structure, one of the most pressing concerns is the rapid growth of mold. Mold thrives in moist environments and can pose serious risks to your health and home. But just how quickly does mold grow after water damage? Let’s dive into the timeline and what you can do to prevent it.

What Causes Mold Growth After Water Damage?

Mold is a type of fungus that reproduces through tiny spores. These spores are always present in the air, but they require the right conditions to grow. Water damage provides the perfect environment for mold to flourish, particularly when the following factors are present:

  • Moisture: Mold needs water to grow. Any standing water, damp surfaces, or high humidity levels can trigger mold growth.
  • Organic Material: Mold feeds on materials like wood, drywall, and carpets, which are commonly affected by water damage.
  • Temperature: Warm temperatures (between 70-90°F) accelerate mold growth, but it can grow in cooler conditions as well.
  • Time: Mold growth doesn’t take long once conditions are favorable.

How Fast Can Mold Grow?

Mold’s growth timeline is alarmingly quick:

  • Within 24-48 Hours: Mold spores begin germinating on damp surfaces. At this stage, you may not see visible signs, but microscopic mold is already developing.
  • Within 72 Hours: Small mold colonies start to form and may become visible as black, green, or white spots on affected surfaces.
  • After a Week or More: Mold growth becomes extensive, spreading to adjacent areas and potentially causing structural damage.

The speed of mold growth underscores the importance of acting immediately after water damage occurs. Delaying cleanup and drying efforts can result in widespread mold infestations that are more costly and time-consuming to address.

Why Is Mold Growth a Problem?

Mold growth after water damage isn’t just unsightly; it comes with significant risks:

  • Health Risks: Mold exposure can lead to respiratory problems, allergies, skin irritation, and more severe health issues for those with compromised immune systems.
  • Structural Damage: Mold can deteriorate walls, ceilings, flooring, and insulation, weakening your home’s structural integrity.
  • Decreased Property Value: A property with visible mold or a history of mold infestations can lose value and deter potential buyers.

Steps to Prevent Mold After Water Damage

The best way to deal with mold is to prevent it from growing in the first place. Here are some steps to take immediately:

  1. Act Fast: Remove standing water as quickly as possible using mops, towels, or a wet-dry vacuum.
  2. Dry the Area Completely: Use fans, dehumidifiers, and ventilation to eliminate excess moisture. Open windows to improve airflow if the weather permits.
  3. Inspect for Hidden Moisture: Areas like carpets, underflooring, and behind walls can retain moisture, so thorough inspection is key.
  4. Disinfect Affected Areas: Cleaning surfaces with mold-inhibiting solutions can help prevent spore growth.
  5. Call Professionals: For extensive water damage, professional restoration services can ensure thorough drying, cleaning, and mold prevention.

How Mold Solutions & Inspections Can Help

At Mold Solutions & Inspections, we understand the urgency of water damage restoration. Our team specializes in:

  • Water Damage Restoration: We quickly remove water and dry affected areas to minimize mold risk.
  • Mold Testing and Remediation: Our advanced techniques detect hidden mold and eradicate it from your property.
  • Comprehensive Services: From biohazard cleaning to asbestos testing, we provide a full suite of restoration and inspection services.

With our expertise, you can trust that your property will be restored to a safe and healthy state. Don’t wait until mold becomes a bigger problem—contact us for a free consultation and prompt assistance.

Time is of the essence when dealing with water damage. Mold can begin growing within 24-48 hours, so immediate action is critical to protecting your home and health. If you’ve experienced water damage, don’t hesitate to reach out to Mold Solutions & Inspections. Let our professionals help you restore your property and prevent mold growth before it starts.

Call us today for expert water damage restoration and mold remediation services!

Is Ice Damage Covered by Homeowners Insurance?

Winter often brings snow and ice, which can lead to significant headaches for homeowners. According to the Insurance Information Institute (III), 1 in every 55 insured homes files a claim related to water damage or freezing each year. Fortunately, most standard homeowners insurance policies include coverage for ice-related damage. However, understanding the details of your policy is crucial. Here’s what you need to know about ice damage and insurance coverage.

Hail Damage and Insurance Coverage

Hail can cause substantial damage to roofs and windows. Most homeowners insurance policies include dwelling coverage, which protects your home against specific perils like hail and other ice-related losses.

If hail damages an external structure on your property, such as a shed or detached garage, it may be covered under other structures coverage, a component of some insurance policies. However, coverage is subject to policy limits and conditions. For tailored advice, consult your insurance agent to determine appropriate levels of protection for your property.

Roof Collapse: When Ice and Snow Get Too Heavy

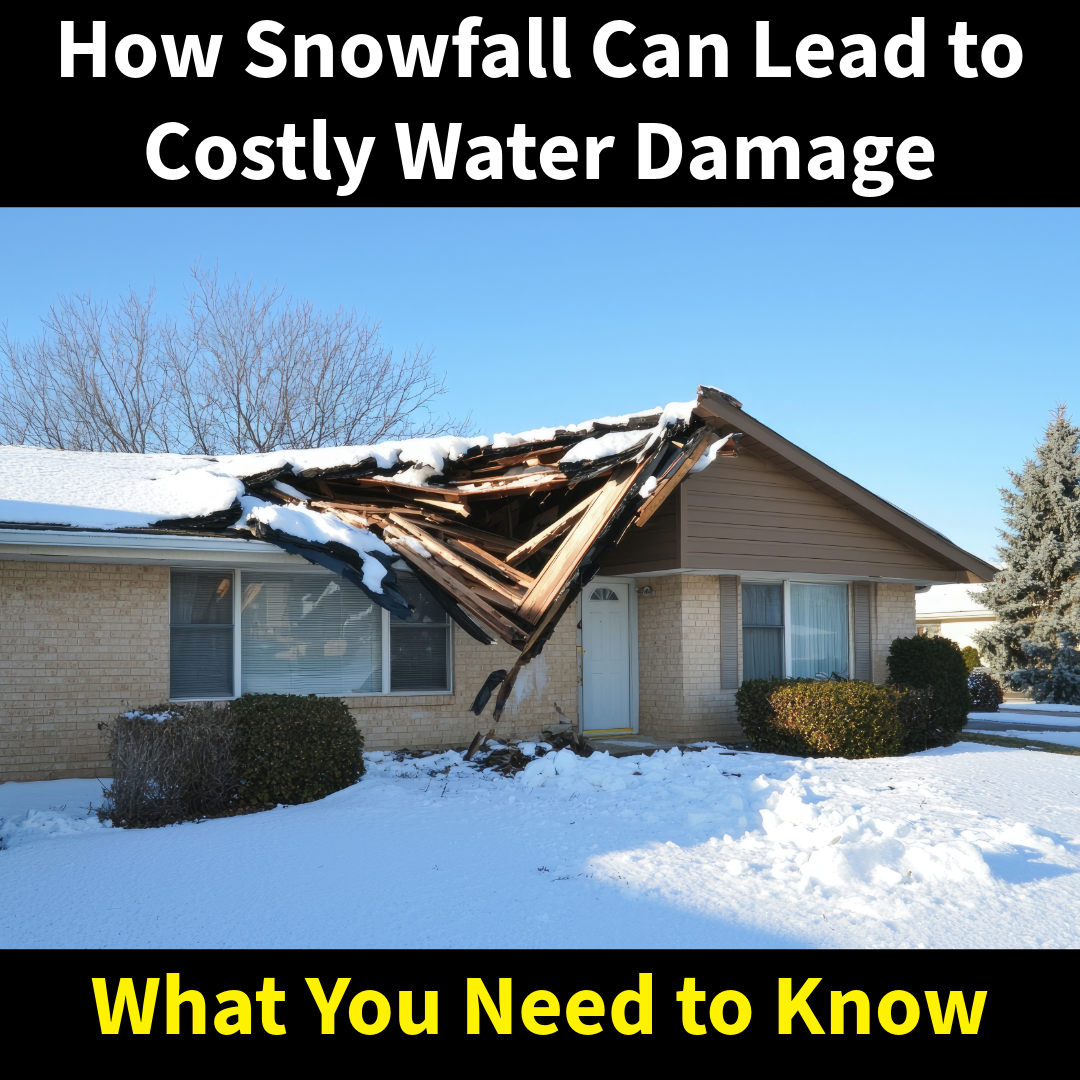
Ice buildup on your roof during winter can lead to roof collapse, especially when the weight of ice and snow becomes excessive. Homeowners insurance typically helps cover the cost of repairing or replacing a roof damaged by a collapse.

Additionally, if your home becomes uninhabitable due to a roof collapse, your policy may also cover additional living expenses, such as hotel bills, while repairs are underway. To prevent roof collapse, consider regular maintenance like clearing ice and snow or cleaning gutters. For safety and efficiency, hire a professional to handle roof maintenance tasks.

Ice Dams: A Common Winter Hazard

Ice dams form when ice accumulates on the edges of your roof, preventing melting snow from draining properly. This trapped water can leak through the roof, causing water damage. Dwelling coverage typically helps cover damage caused by ice dams, but personal property coverage may not include this type of loss.

It’s important to note that while homeowners insurance may not cover the cost of ice dam removal, it usually covers the resulting water damage to your home. Routine maintenance, such as cleaning gutters, can help prevent ice dams. According to the III, keeping gutters clear allows water to flow freely and reduces the risk of damage.

Frozen and Burst Pipes: Are They Covered?

Frozen or burst pipes can lead to significant water damage in your home. Homeowners insurance often covers this type of damage, but only if proper precautions were taken to maintain a safe indoor temperature. The National Association of Insurance Commissioners warns that neglecting to heat your home may void coverage for frozen pipes.

Review your policy limits and terms to understand your level of coverage for pipe-related damages.

Injuries on Ice: Liability Coverage

Ice on walkways and driveways can pose serious risks to visitors. If someone slips and falls on ice on your property and decides to sue, liability coverage included in your homeowners insurance may help protect you. This coverage can assist with medical bills, lost wages, or legal fees if you’re found responsible for the injury.

For additional protection, consider a personal umbrella policy, which extends liability coverage limits and provides extra peace of mind during winter months.

Prepare for Winter: Know Your Coverage

As winter approaches, review your homeowners insurance policy to understand what’s covered and identify potential gaps. Your insurance agent can help you adjust your coverage to meet your needs. While you can’t avoid winter weather, knowing you’re protected against ice-related damage can provide peace of mind during the colder months.

How Much Does Water Damage Restoration Cost?

Water damage can be a homeowner’s nightmare, causing significant stress and unexpected expenses. Understanding the cost of water damage restoration can help you plan for emergencies and take swift action when disaster strikes. While every situation is unique, several factors determine the overall cost of restoring your property.

Factors Affecting Water Damage Restoration Costs

1. Size of the Affected Area

The size of the area impacted by water damage plays a significant role in determining costs. Larger spaces require more time, materials, and labor to address effectively, which can drive up the overall expense.

2. Type of Water Involved

Not all water is the same when it comes to damage restoration. Clean water from a broken pipe or faucet is easier and less costly to manage than gray water (from appliances) or black water (contaminated water from sewage or flooding), which require specialized cleaning and disinfection.

3. Extent of the Damage

The severity of the damage also impacts costs. Surface-level water damage may only require drying and minor repairs, whereas extensive damage affecting walls, flooring, and structural elements can significantly increase restoration expenses.

4. Type of Materials Damaged

Different materials have varying restoration costs. For example, hardwood floors and carpets require distinct approaches, and restoring them may cost more than repairing drywall or tile. Replacing custom or high-end materials can further raise costs.

5. Additional Services Needed

In some cases, water damage can lead to complications such as mold growth, requiring additional remediation services. Other scenarios may involve replacing damaged insulation, fixing plumbing issues, or addressing electrical concerns, all of which add to the overall expense.

Average Costs for Water Damage Restoration

Water damage restoration costs vary widely based on the factors mentioned above. However, here are some general ranges to help you estimate:

  • Minor Damage: $1,000 to $2,000 (e.g., small leaks affecting limited areas, which account for about 20% of all water damage claims)
  • Moderate Damage: $2,500 to $6,500 (e.g., moderate flooding or damage to multiple rooms, which account for about 70% of all water damage claims)
  • Severe Damage: $7,000 to $20,000 or more (e.g., extensive damage to multiple floors or a wide space or black water contamination, which is rarer and only account for about 10% of all water damage claims)

Typical cost breakdown:

  • Inspection and Assessment: $200 to $600
  • Water Extraction: $1,000 to $3,000
  • Drying and Dehumidification: $800 to $3,500
  • Repairs and Reconstruction: $1,000 to $10,000 or more, depending on the scope.

How to Save on Restoration Costs

  1. Act Quickly: Addressing water damage immediately can prevent further issues, such as mold growth or structural damage, reducing overall costs.
  2. Regular Maintenance: Regularly inspect and maintain your plumbing, roof, and gutters to minimize the risk of water damage.
  3. Hire Professionals: While DIY efforts might seem cost-effective, professional restoration companies have the expertise and equipment to resolve issues efficiently, saving you money in the long run.

Why Choose Professional Restoration Services?

Professional water damage restoration services offer numerous benefits, including:

  • Expertise: Trained technicians can accurately assess the damage and recommend the best solutions.
  • Specialized Equipment: High-powered tools and technology ensure effective water removal and drying.
  • Time Efficiency: Professionals work quickly to minimize disruptions and prevent further damage.

At MSI, we specialize in comprehensive water damage restoration services. Our experienced team is equipped to handle all aspects of restoration, from initial assessment to final repairs, ensuring your property is restored to its original condition.

Conclusion

Water damage restoration costs can vary based on factors such as the size of the affected area, the type of water involved, and the extent of the damage. Addressing issues promptly and partnering with a trusted professional helps keep costs manageable and ensures quality results. Beware of companies that inflate invoices by charging for unperformed services or deliver subpar work, which could lead to mold growth and complicate insurance claims. If you’re facing water damage, don’t delay. Contact Mold Solutions & Inspections today for a thorough assessment and expert restoration services. Protect your property and peace of mind with our reliable solutions.

What Are Ice Dams & How to Prevent Them

You may be feeling warm in your home as the snow serenely falls outside. But, up on your roof, a dangerous situation could be forming – one that can compromise your roof and lead to water damage inside your home. It’s all the result of an ice dam. In this blog, we’ll discuss what is an ice dam, and how to avoid one which can save you money in the long run.

What Is an Ice Dam?

An ice dam is a ridge of ice that forms along the edge of your roof and prevents snow melt from running off. It often occurs because heat from the attic warms the middle of your roof, causing snow to melt. When that runoff reaches the eaves, or overhang, of your roof, the cooler surface temperature (there’s no heat rising from inside your home to this part of the roof) can cause the water to refreeze. As this happens over and over, an ice dam forms, preventing melted snow from running off your roof.

Do Ice Dams Cause Damage?

Yes, ice dams cause the water from melted snow to back up under the shingles of your roof and into your home – the water doesn’t have anywhere else to go. This can damage your roof, not to mention your interior. And, remember, water damage can lead to toxic mold inside your home.

How Can I Prevent Ice Dams?

An easy way to help prevent ice dams is to keep your eaves, gutters, downspouts and drains clear. This way water can drain away from your home as snow melts on your roof. It’s ideal to have your gutters cleaned out before snow season even begins. While you’re at it, install gutter screens for added protection.

Here are some other ways to help prevent ice dams:

  • Keep your attic cool. Proper insulation between your living areas and attic will help keep warm air from escaping into your attic and warming your roof. Ideally, during a snow storm, your attic won’t be more than 10 degrees warmer than the temperature outside.
  • Remove snow with a roof rake. Only if you can safely do so, remove accumulated snow from your roof using a long-handled roof rake, a specialized tool for clearing roofs, that won’t damage your roofing material. Do this from the ground. Never climb on top of a snowy roof.
  • Update your roof with materials that help prevent ice dams. These include a rubberized, water-repellant membrane underneath the shingles and a heating cable along the eaves. For either installation, consult a professional.

Ice dams may not be the first thing you think about once the snow stops coming down. After all, there’s the sidewalk and driveway to clear. But, for the sake of your roof and the integrity of your overall home, it’s important to keep an eye out for this winter roof danger.

So, how can you spot ice dams? Icicles may be a sign of ice dams, a buildup of snow and ice along your eaves that blocks water runoff. Discolored ceilings or walls may indicate that your ice dam has turned into a leak. Remember, in the midst of this harsh winter, it’s important to keep your gutters clear, your roof updated and an eye out for the signs of ice dams. If you suspect trouble, call a trusted roofing contractor at once.

Preventing and Addressing Frozen Pipes: Winter Water Damage Solutions

Winter brings challenges for homeowners, and frozen pipes are among the most common culprits behind water damage during the colder months. Here, we’ll explore why pipes freeze, how to prevent it, and what to do if disaster strikes.

Why Do Pipes Freeze?

When temperatures drop, the water inside pipes can freeze and expand, increasing pressure and potentially causing the pipes to burst. Vulnerable areas include uninsulated spaces like basements, attics, and exterior walls.

How to Prevent Frozen Pipes

  1. Insulate Your Pipes: Wrap pipes in unheated areas with foam insulation to retain warmth.
  2. Keep the Heat On: Maintain consistent heating throughout your home, even when you’re away.
  3. Let Faucets Drip: A slow drip keeps water moving, reducing the chance of freezing.
  4. Seal Gaps: Close gaps around windows, doors, and pipes that allow cold air to seep inside.

Recognizing Frozen Pipes

Common signs include:

  • No water or reduced water flow.
  • Frost on exposed pipes.
  • Unusual noises when turning on faucets.

What to Do If a Pipe Freezes

  1. Turn Off the Water: Locate and shut off the main water supply to minimize potential flooding.
  2. Thaw the Pipe Safely: Use a hairdryer or heat tape—never an open flame—to warm the pipe gradually.
  3. Call a Professional: If you’re unsure how to proceed or suspect a burst pipe, seek professional help immediately.

Addressing Burst Pipes and Water Damage

When a pipe bursts, immediate action is crucial to mitigate water damage:

  • Remove Standing Water: Mop or use a wet/dry vacuum to prevent further damage.
  • Dry Affected Areas: Use fans and dehumidifiers to reduce moisture and prevent mold growth.
  • Contact Water Damage Specialists: Professionals can ensure thorough drying, structural repairs, and mold prevention.

Why Professional Water Damage Restoration Matters

Quick and professional restoration prevents long-term damage like warped flooring, weakened foundations, and mold infestations. That’s where our team at MSI comes in. Our expert team provides comprehensive water damage restoration services, from water extraction and drying to mold prevention and dehumidification. We’re committed to restoring your home quickly and safely, so you can have peace of mind this winter.

Winter doesn’t have to spell disaster for your home. By taking preventative measures and knowing how to respond when pipes freeze or burst, you can safeguard your property against water damage.

What Should I Do After a Fire in My House?

Experiencing a fire in your home is a devastating event, but knowing the right steps to take afterward can make a significant difference in how quickly and effectively you recover. Here is a detailed guide to help you navigate the aftermath of a house fire, protect your family, and restore your property.

1. Ensure Safety First

The safety of you and your family is the top priority. Once the fire is out, make sure everyone is accounted for and safe. Do not re-enter your home until the fire department has deemed it safe to do so. There could be hidden dangers, such as structural damage, lingering smoke, or hot spots that could reignite.

2. Contact Your Insurance Company Immediately

Notify your insurance provider about the fire as soon as possible. They will guide you through the claims process and may provide a list of approved vendors for restoration work. Take detailed notes of all conversations and keep copies of any documentation they require.

3. Document the Damage

Take photos and videos of the fire damage before any cleanup begins. This documentation is essential for your insurance claim. Be thorough, capturing images of every room, including personal belongings, structural damage, and smoke or water damage.

4. Secure Your Property

If your home is uninhabitable, work with your insurance company or a fire damage restoration professional to secure the property. Boarding up windows, tarping the roof, and locking doors can prevent additional damage or theft.

5. Contact a Fire Damage Restoration Company

Professional fire damage restoration companies specialize in cleaning, repairing, and restoring homes affected by fire, smoke, and water damage. Experts like Mold Solutions & Inspections (MSI) act quickly to mitigate damage, remove soot, and restore your home to its pre-fire condition. Hiring professionals ensures the cleanup is done safely and thoroughly, avoiding long-term issues like smoke residue or mold growth.

6. Address Immediate Needs

If your home is unsafe to live in, arrange for temporary housing. Many insurance policies cover living expenses, such as hotel stays, meals, and transportation. Retain all receipts to submit for reimbursement.

7. Begin the Cleanup Process

Cleanup after a fire is not just about removing debris. It involves addressing fire, smoke, and water damage. Smoke residue can settle on surfaces and belongings, causing further damage if not treated promptly. Water from firefighting efforts can lead to mold growth, so immediate drying and dehumidifying are critical. Professional fire restoration companies have the tools and expertise to handle these challenges efficiently.

8. Salvage What You Can

While some items may be beyond repair, others can often be restored with proper cleaning. Professionals can help salvage valuables such as furniture, clothing, electronics, and important documents using specialized techniques.

9. Review Fire Safety Measures

Use this experience as an opportunity to reassess and improve your fire safety measures. Install or update smoke detectors, create an emergency evacuation plan, and consider investing in fire-resistant materials for future renovations.

10. Seek Emotional Support

Recovering from a fire is not just a physical process but an emotional one as well. Losing your home and possessions can be overwhelming. Don’t hesitate to seek support from friends, family, or professional counselors.

Why You Need a Trusted Fire Damage Restoration Partner

Dealing with fire damage is a complex process that requires expertise and precision. An IICRC certified restoration company like our team at MSI can help minimize stress and ensure your home is restored quickly and efficiently. With 24/7 availability, state-of-the-art equipment, and years of experience, MSI is here to help you every step of the way.

A house fire is a life-altering event, but with the right steps and support, you can recover and rebuild quickly. Focus on safety, work closely with your insurance provider, and enlist trusted professionals to handle the restoration process. By acting quickly and effectively, you can minimize damage and return to the comfort of your home sooner.

If you’ve experienced a fire and need assistance, contact Mold Solutions & Inspections today for expert fire damage restoration services.

The Importance of Water Extraction

When it comes to water damage restoration, one of the most critical steps is water extraction. Prompt and effective water removal can significantly reduce the extent of damage to your property and prevent further issues, such as mold growth. In this blog, we’ll discuss what water extraction is, its importance, and the process involved.

What is Water Extraction?

Water extraction is the process of removing standing water from a property following a water damage event. This can result from various sources, including flooding, burst pipes, or appliance leaks. The goal of water extraction is to eliminate as much water as possible to minimize damage and set the stage for effective drying and restoration.

Why is Water Extraction Important?

  1. Prevents Structural Damage: Standing water can weaken structural elements of your home, such as walls, floors, and foundations. Prompt extraction helps maintain the integrity of your property.
  2. Reduces Mold Growth: Mold can begin to develop within 24 to 48 hours after water exposure. Efficient water extraction reduces moisture levels, helping to prevent mold and mildew infestations.
  3. Improves Air Quality: Excess moisture can lead to poor indoor air quality and health issues. By removing water quickly, you can help ensure a healthier living environment.
  4. Minimizes Loss of Personal Belongings: The longer water remains, the more likely personal items and furnishings will be damaged. Swift extraction can save your valuables from irreparable harm.
  5. Facilitates the Restoration Process: Water extraction is a crucial first step in the overall restoration process, allowing other recovery efforts, like drying and sanitizing, to proceed more effectively.

The Water Extraction Process

  1. Assessment: A professional will assess the damage, determining the extent of the water intrusion and identifying the source.
  2. Water Removal: Using specialized equipment like submersible pumps and wet vacuums, professionals will remove standing water quickly and efficiently.
  3. Drying: After extraction, high-powered fans and dehumidifiers are used to dry out the affected areas, ensuring no moisture remains in walls, floors, or other materials.
  4. Cleaning and Sanitizing: The final step involves cleaning and disinfecting to eliminate bacteria and prevent mold growth.

Conclusion

Water extraction is a vital part of the water damage restoration process. Acting quickly and effectively can save your home from significant damage and help restore it to its pre-loss condition. Some water damage restoration companies do not have the appropriate equipment and training, thusly leaving wet materials behind and mold to grow at a later date. Be sure to do your due diligence when hiring a water damage restoration company, as poor workmanship and over billing can lead to massive issues down the road.

How to Prevent Mold Growth After Water Damage

Water damage can wreak havoc on your home, and one of its most persistent and hazardous consequences is mold growth. Mold can start growing within 24-48 hours after water exposure, causing health risks and structural damage if left unchecked. Fortunately, with prompt action and the right steps, you can prevent mold from taking hold in your home.

Here’s a comprehensive guide to preventing mold growth after water damage.

1. Act Fast: Time is Critical

Mold thrives in moist environments, so addressing water damage quickly is essential. The longer water sits, the more likely mold spores will spread and grow.

What to Do:

  • Begin water removal immediately.
  • Contact a professional restoration company if the damage is extensive.

2. Remove Standing Water

Standing water creates an ideal breeding ground for mold. Use tools like wet/dry vacuums, mops, and towels to remove as much water as possible.

Pro Tip: If the area is heavily flooded, call a professional for safe and efficient water extraction.

3. Dry the Area Thoroughly

Even after water is removed, damp materials and surfaces can still promote mold growth.

Steps to Take:

  • Use fans and dehumidifiers to speed up the drying process.
  • Open windows and doors to improve ventilation (weather permitting).
  • Remove soaked carpets, padding, and furniture to dry them separately.

Key Tip: Monitor humidity levels using a hygrometer. Keep indoor humidity below 50% to inhibit mold growth.

4. Dispose of Unsalvageable Items

Some materials are difficult to dry completely and may need to be discarded to prevent mold.

Items to Watch:

  • Water-damaged drywall and insulation.
  • Carpets and rugs soaked for over 24-48 hours.
  • Upholstered furniture and porous items like books or cardboard.

Pro Tip: Always follow local disposal regulations for damaged items.

5. Clean and Disinfect Affected Areas

Cleaning surfaces after water damage helps remove any mold spores that may have already settled.

What to Use:

  • A mix of detergent and water for general cleaning.
  • A solution of one cup of bleach to one gallon of water for hard surfaces (never mix bleach with ammonia or other cleaners).

Important: Wear protective gear, such as gloves and masks, when cleaning to avoid exposure to mold spores.

6. Inspect Hidden Areas

Mold often grows in hidden places, such as behind walls, under flooring, or in HVAC systems.

Key Areas to Check:

  • Inside wall cavities.
  • Underneath carpets and floorboards.
  • Behind large furniture or appliances.

Tip: If you suspect mold in hidden areas, consider hiring a professional for a thorough inspection.

7. Replace and Repair Damaged Materials

Some materials, like drywall, insulation, and wood, can retain moisture even after drying. Replacing them reduces the risk of future mold growth.

What to Replace:

  • Severely water-damaged drywall and insulation.
  • Warped wood or compromised structural materials.

8. Prevent Future Water Damage

The best way to combat mold is by stopping water damage before it starts.

Preventative Measures:

  • Fix leaky roofs, pipes, and appliances promptly.
  • Ensure gutters and downspouts direct water away from your home.
  • Seal windows, doors, and foundations to prevent water infiltration.

9. Use Mold-Resistant Products

When rebuilding after water damage, opt for mold-resistant materials to safeguard your home.

Options Include:

  • Mold-resistant drywall.
  • Mold-inhibiting paint.
  • Moisture-resistant flooring.

10. Call in the Professionals

If the water damage is extensive or mold growth has already begun, it’s best to consult experts. Professional restoration companies have the tools, training, and experience to safely and effectively handle water damage and mold prevention.

Benefits of Professional Help:

  • Industrial-grade drying and dehumidification equipment.
  • Specialized cleaning solutions and techniques.
  • Peace of mind knowing your home is safe and mold-free.

Why Mold Prevention Matters

Mold not only damages your home but can also pose significant health risks, including:

  • Respiratory problems.
  • Allergic reactions.
  • Aggravation of asthma symptoms.

Preventing mold growth after water damage protects both your property and your family’s health.

We’re Here to Help

Dealing with water damage can be overwhelming, but you don’t have to face it alone. At Mold Solutions & Inspections, we specialize in water damage restoration and mold prevention, offering fast and effective solutions to protect your home.

Contact us today for expert assistance, and let us restore your home to its original condition—mold-free and safe!